Accessing the Portal
- Open your browser and go to https://scanhub.upscan.com (Chrome or Safari recommended).
- Sign in with your GUSI credentials.
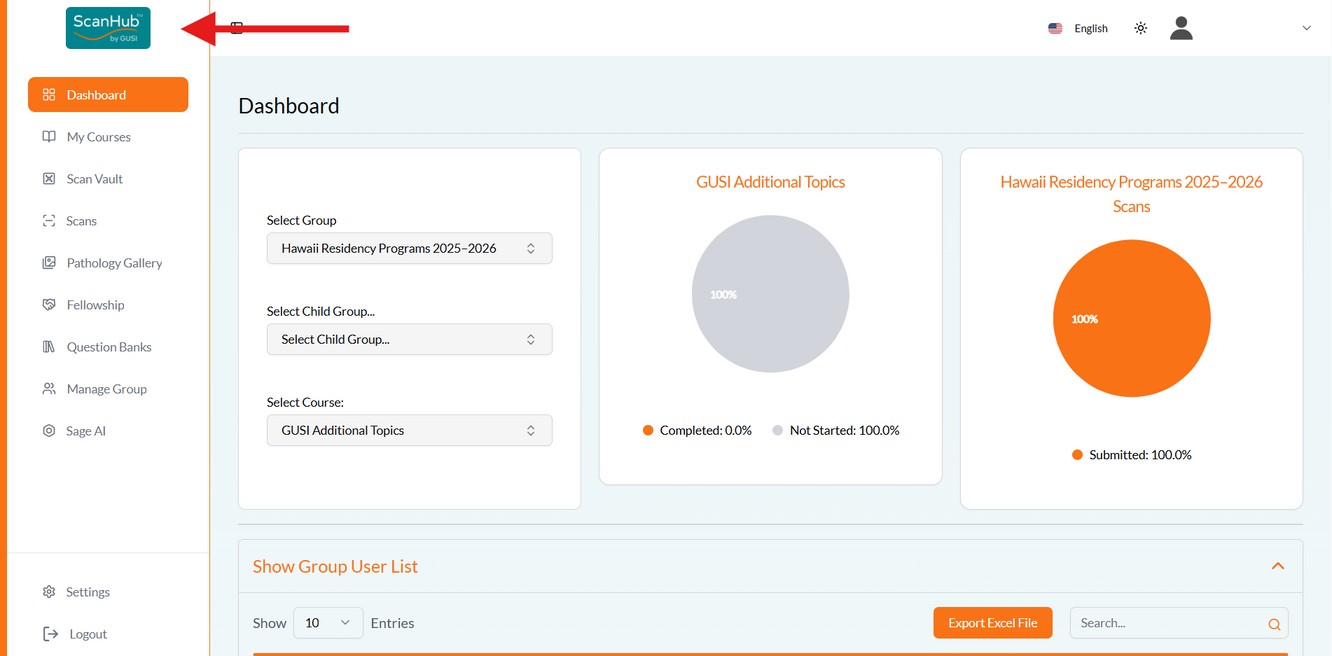
- You’ll land on your Dashboard, showing your progress.
Creating a New Exam & Uploading Files
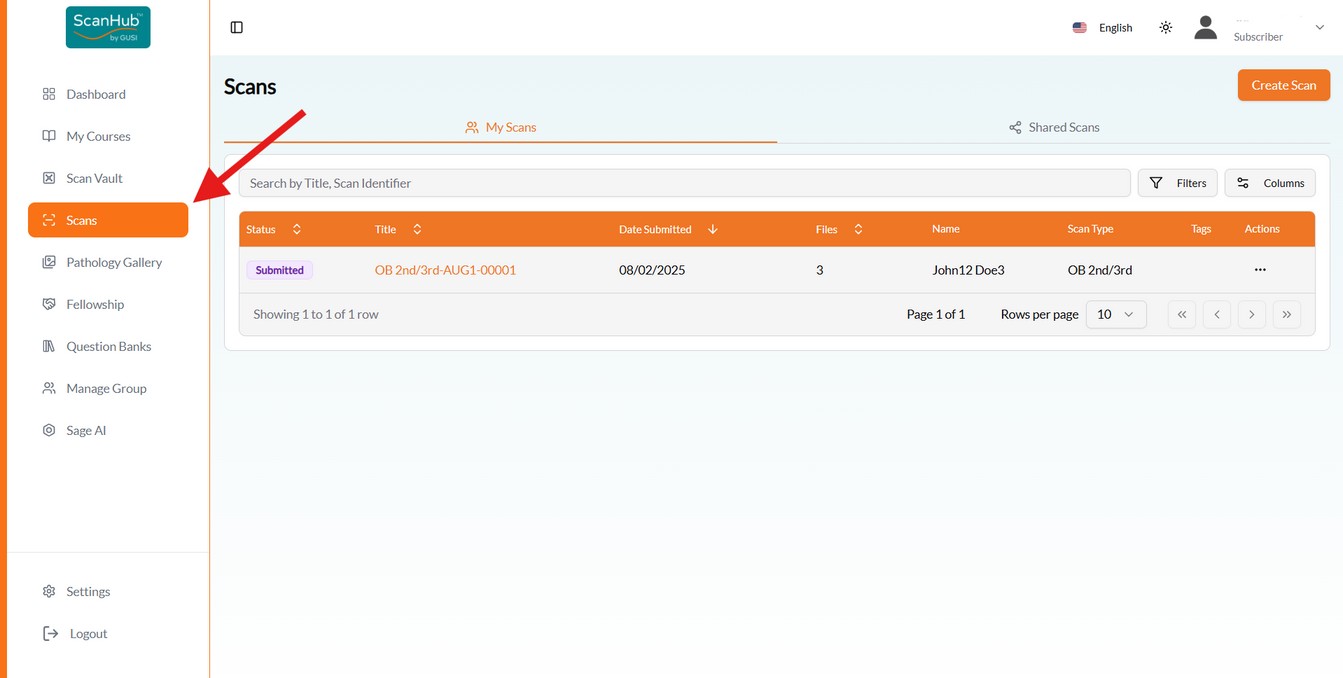
- Click Scan Study on the left side of the screen, then Create Scan at top right.
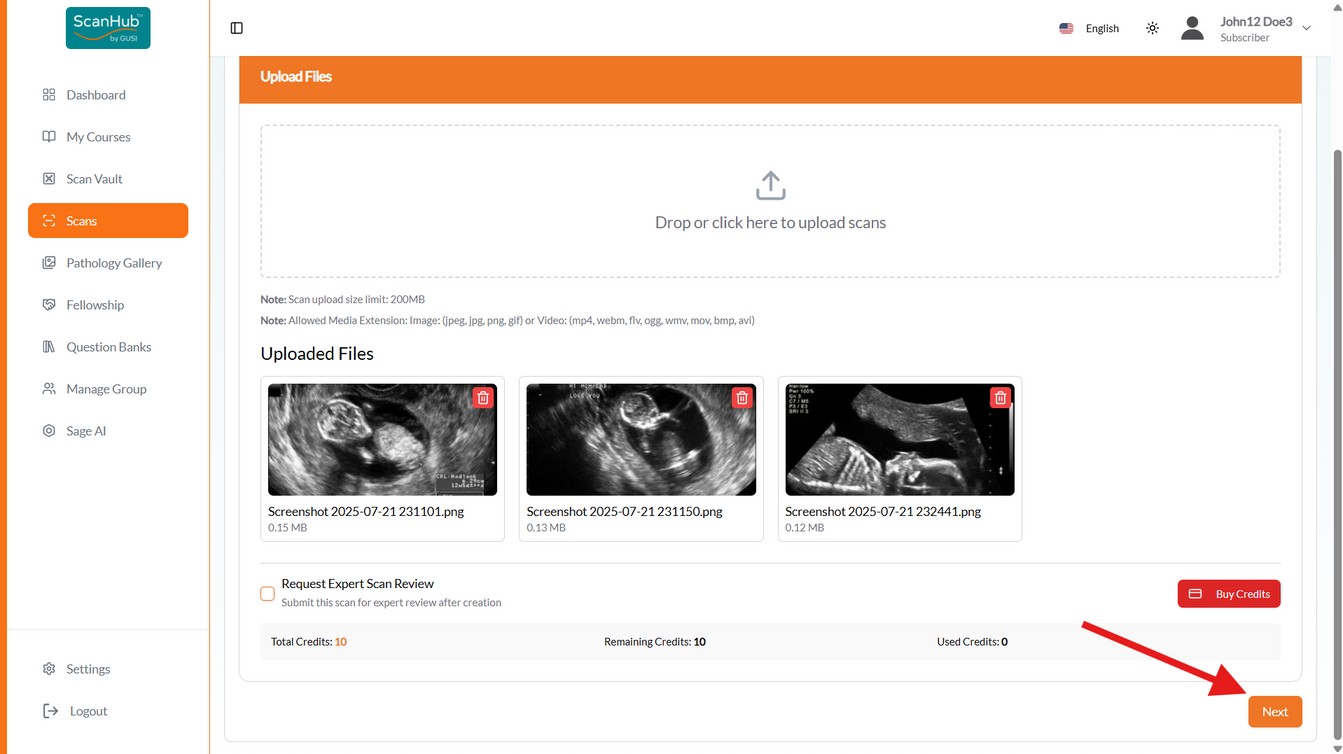
- Drag and drop (or click to select) your cine loops (MP4/DICOM) and still images (PNG/JPEG/DICOM). Each file should represent one view (e.g., “RUQ FAST,” “PLAX,” “Popliteal Vein”). Keep each file within the accepted formats and size limit.
- Repeat until all files for the exam are uploaded, then click Next.
- Select the Scan Type from the dropdown — the page transitions to the submission form.
- Fill out the required interpretation fields (scroll to see all). Normal findings appear green; abnormal appear red. Use the patient presentation & clinical question field for scanning/technical issues and questions for reviewers.
- Click Submit. You can then go to the Scan List, Scan Details, or create another scan.
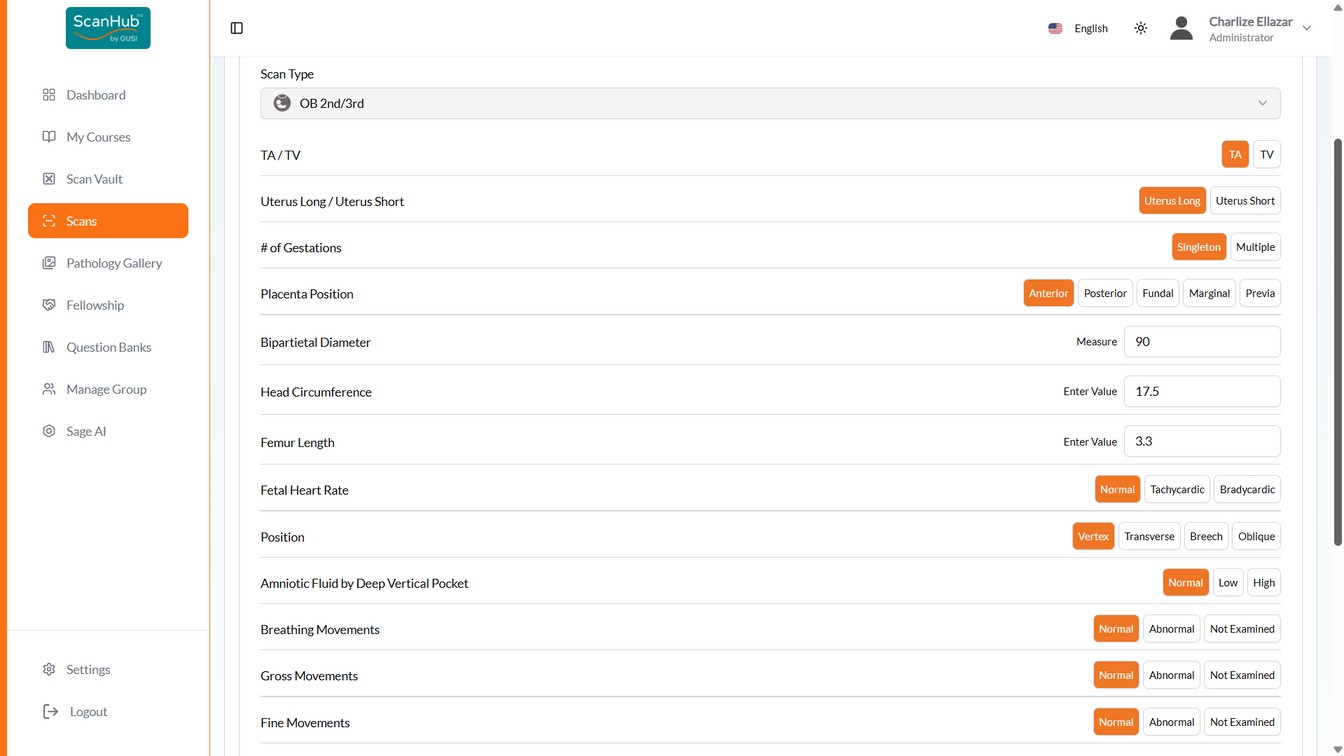
Terminology: a “file” is one image or video; a “scan” is all files associated with one patient in one encounter — e.g., a 2nd-trimester OB scan might include amniotic fluid, placenta, fetal position, and heart rate images plus a video showing a single fetus.
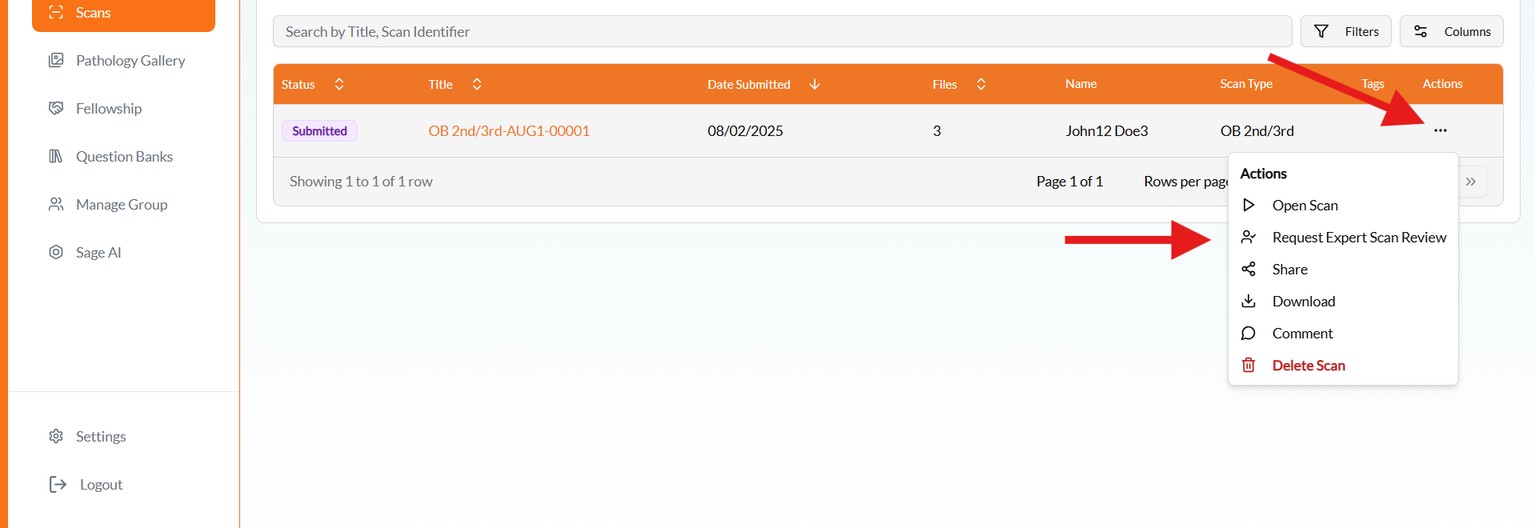
Requesting Expert Scan Review
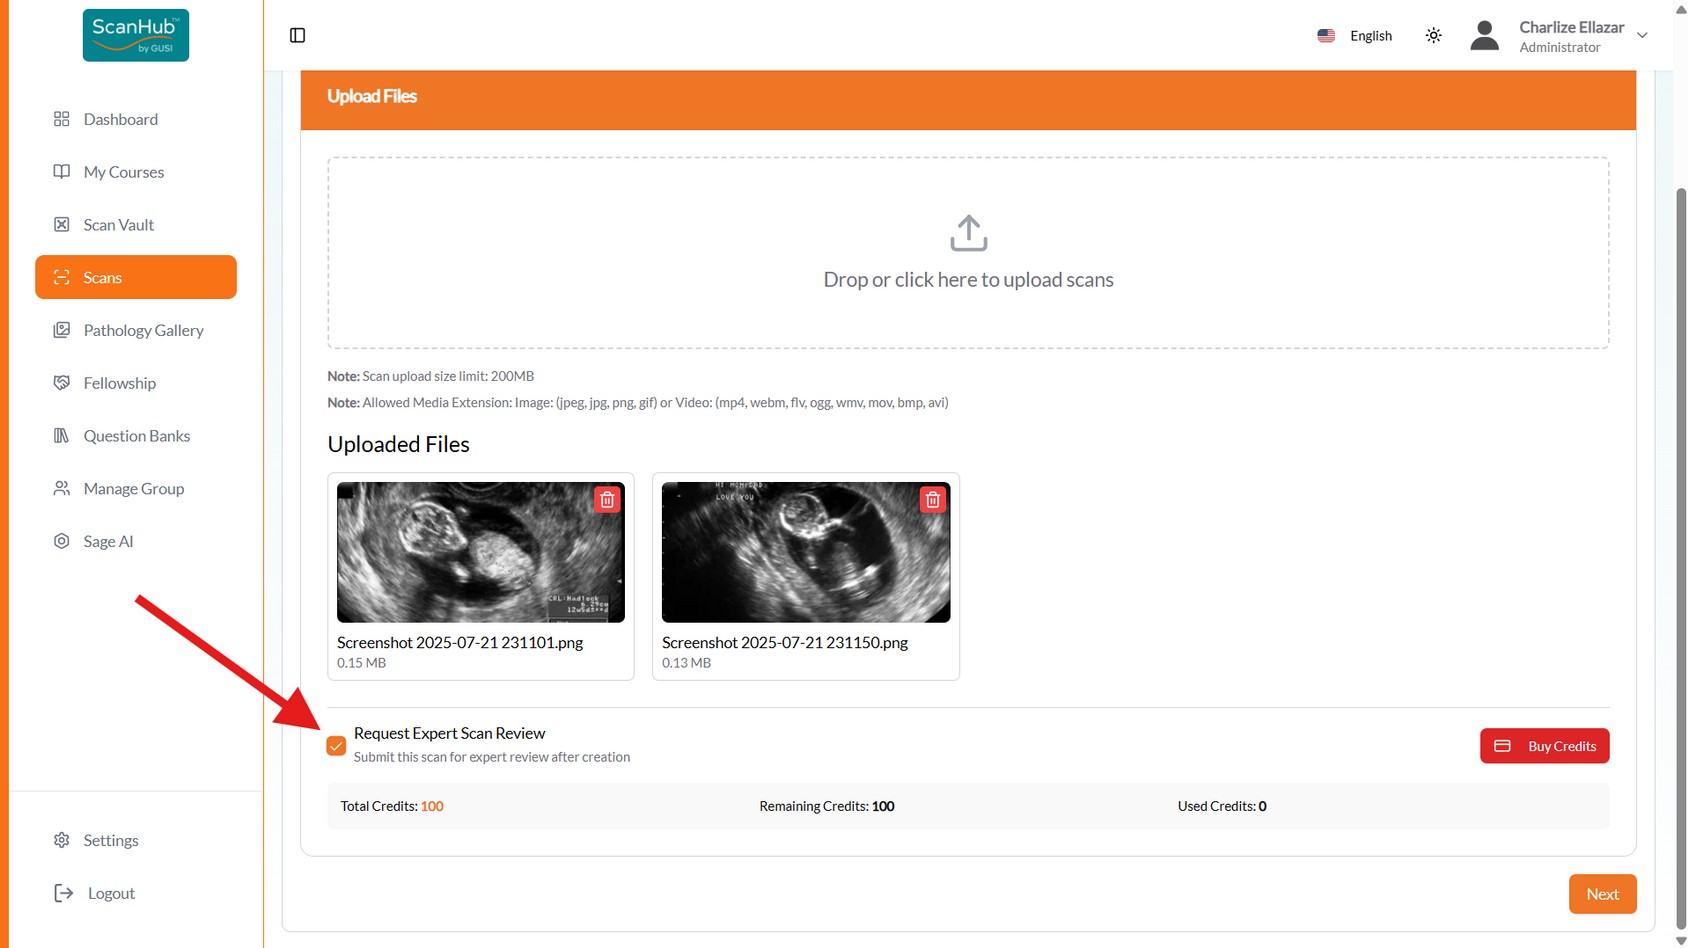
- If your fellowship includes GUSI scan review (standard), check “Request Expert Scan counts as one of your paid scans
Review” during file upload — the GUSI team will review with detailed feedback and it
- Forgot to check the box? Open the menu button beside the submitted scan in the Scans list and make the request there
- Make sure you have enough credits — buy more via the Buy Credits button in the Credit
Information section
- Reviews are usually returned within 72 business hours; read detailed feedback under
Reviewed
Managing Submitted Scans
- The Scans list shows whether scans were properly submitted or still in draft form; click a scan’s title to reopen and submit drafts later
- View, email, or download scans from the actions on the right
- You’ll receive an email or in-app notification once a mentor completes the review
Web Tips & Cautions
- Keep filenames short and descriptive (e.g., Echo_PLAX_6s.mp4)
- Confirm videos play back correctly before submission
- If uploads stall: refresh and retry smaller batches (2–3 files), try a different device or network, or upload one file at a time
- Very large uploads may fail — trim cine loops to 6 seconds maximum
- All uploads are encrypted in transit and automatically de-identified
Related Articles
Ultrasound Machine Capture & Export Tips
Scan Quality Best Practices
Uploading Scans: Web Portal
Uploading Scans: Mobile App
Scan Vault: Storing & Managing Scans
Need more help?
If you require further assistance or discovered an error in our support documentation, please contact us by emailing support@globalultrasoundinstitute.com