Contents
Five short tasks to get you productive in ScanHub on day one.
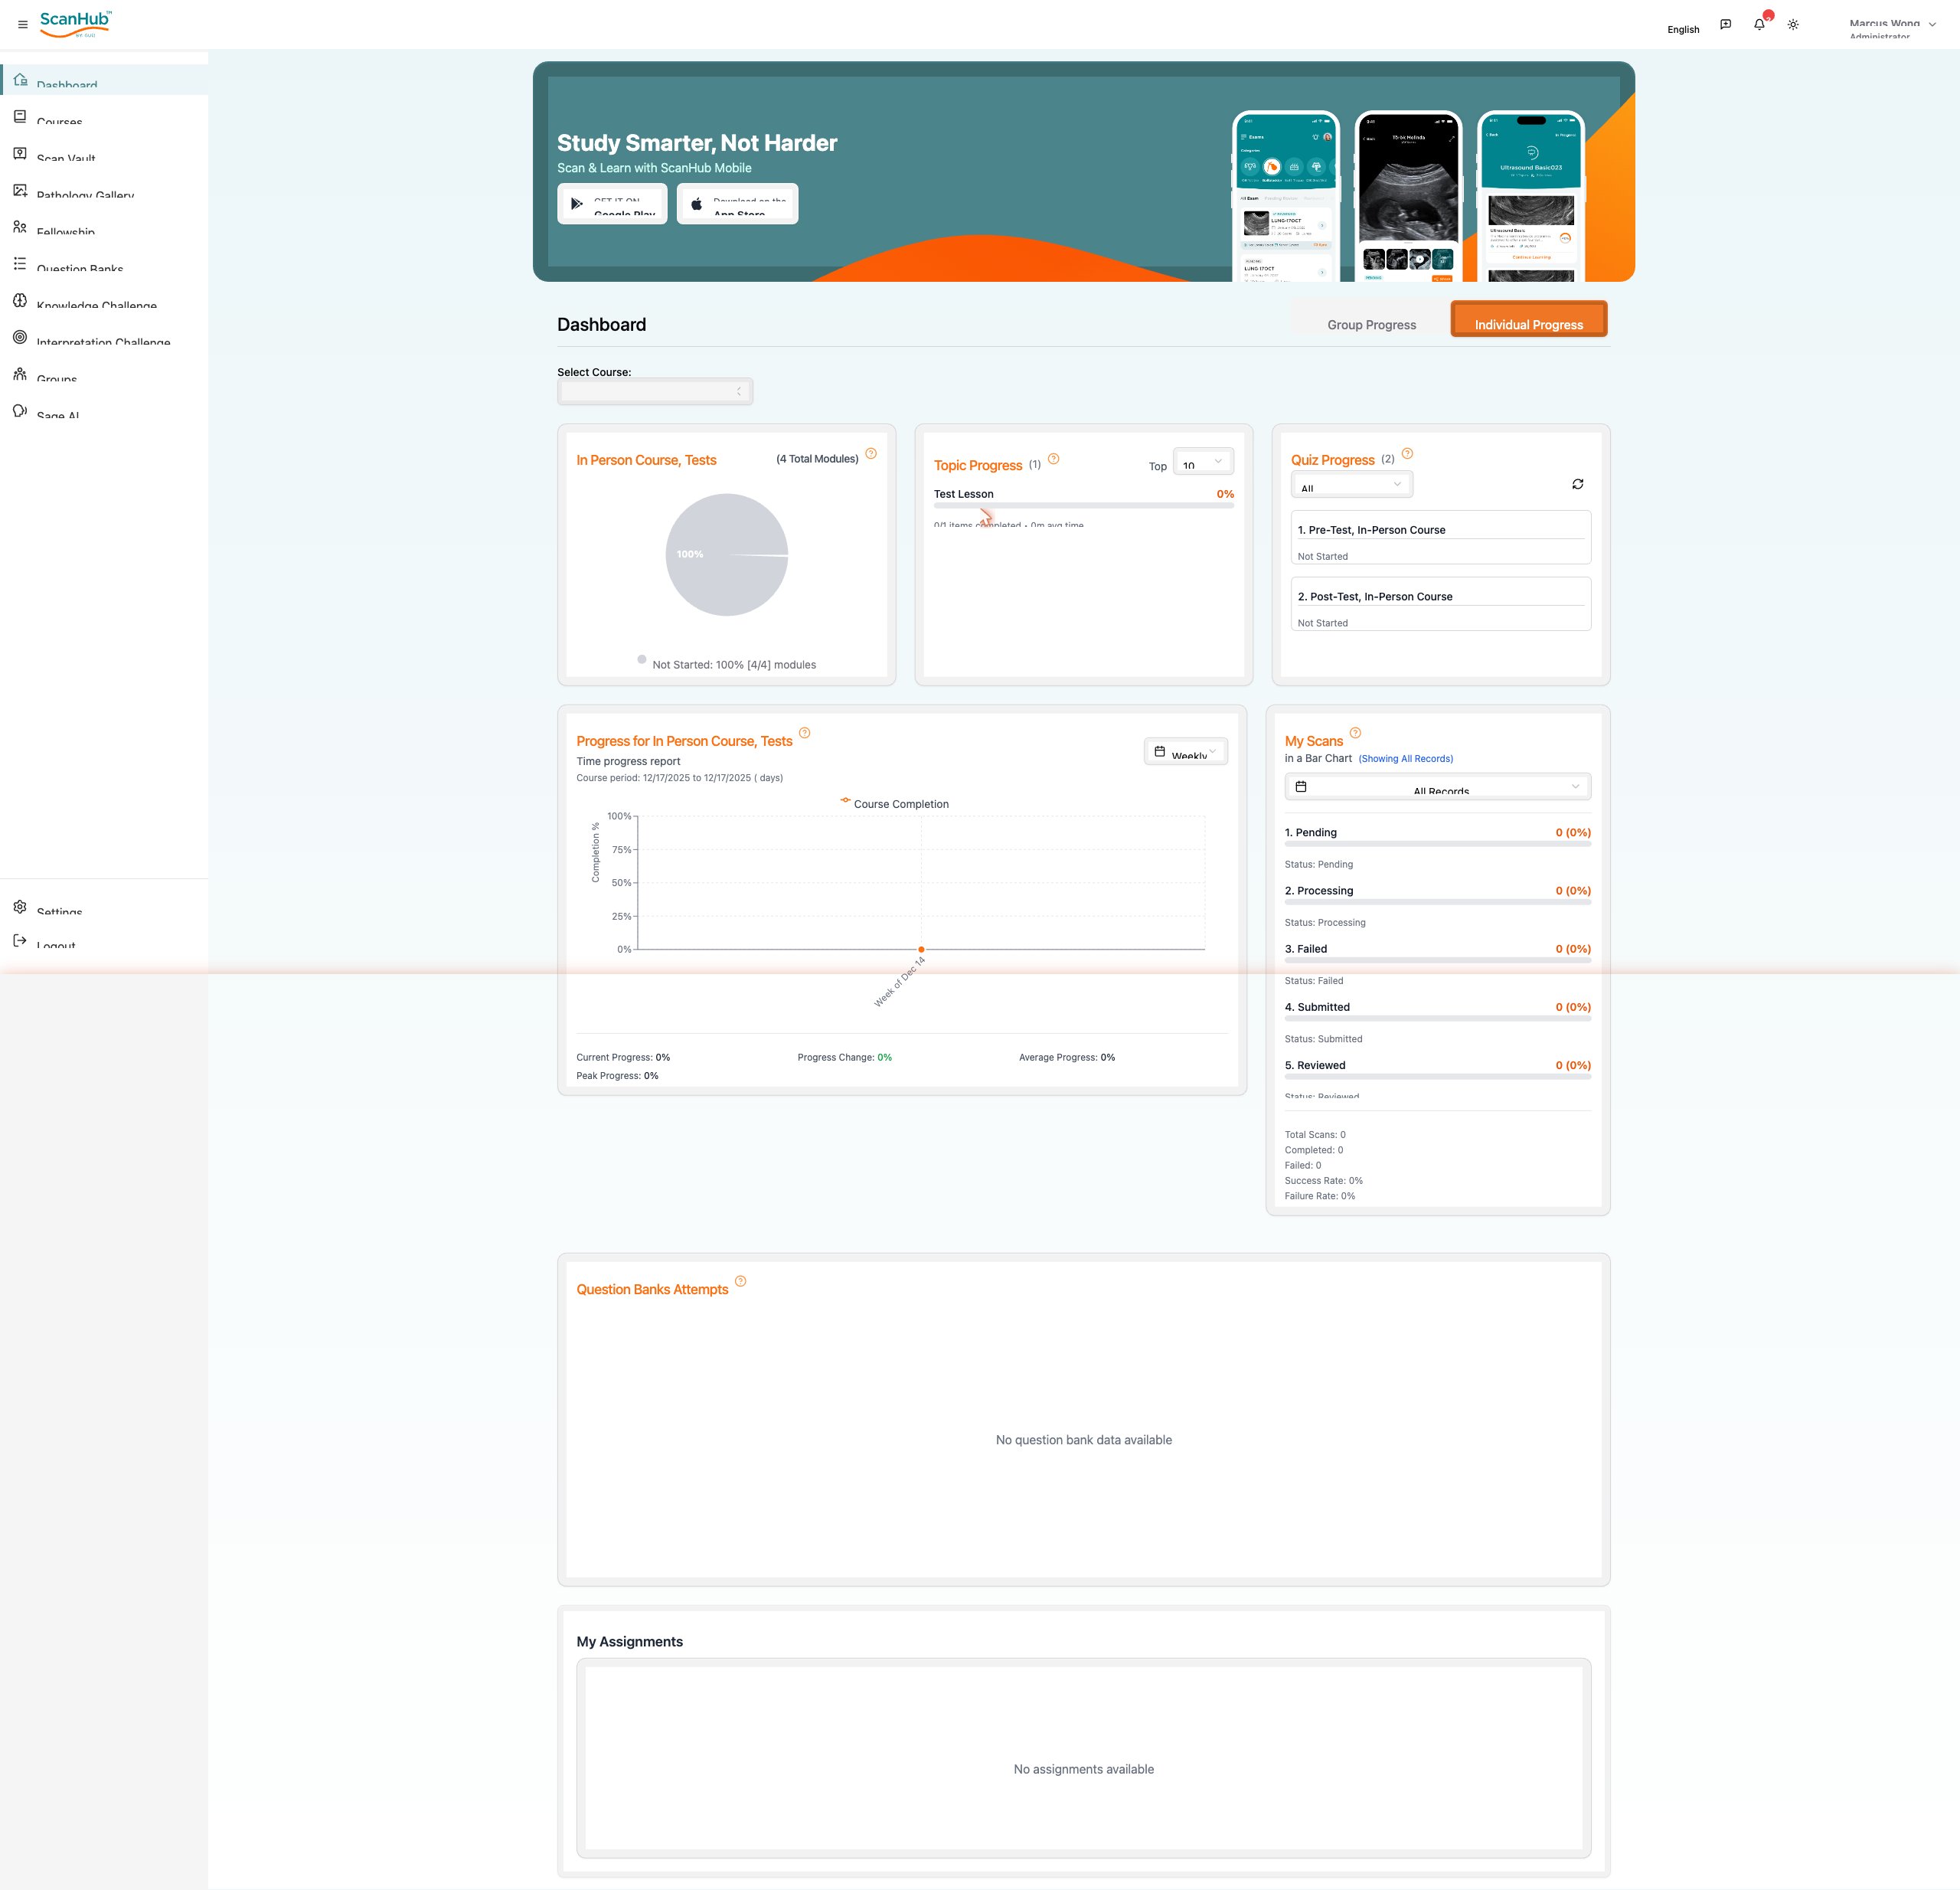
1. Sign in and read your Dashboard
- Open your browser and go to scanhub.upscan.com.
- Sign in with the email and password provided by your organization. ScanHub opens on the Dashboard.
- Use the left navigation rail to move between areas. Use the toggle in the top-right of the Dashboard to switch between Individual Progress and Group Progress.
The Dashboard summarizes your learning and scanning activity: course and topic completion, quiz results, a progress-over-time chart, your scan pipeline (Pending, Processing, Failed, Submitted, Reviewed), question-bank attempts and any assignments.
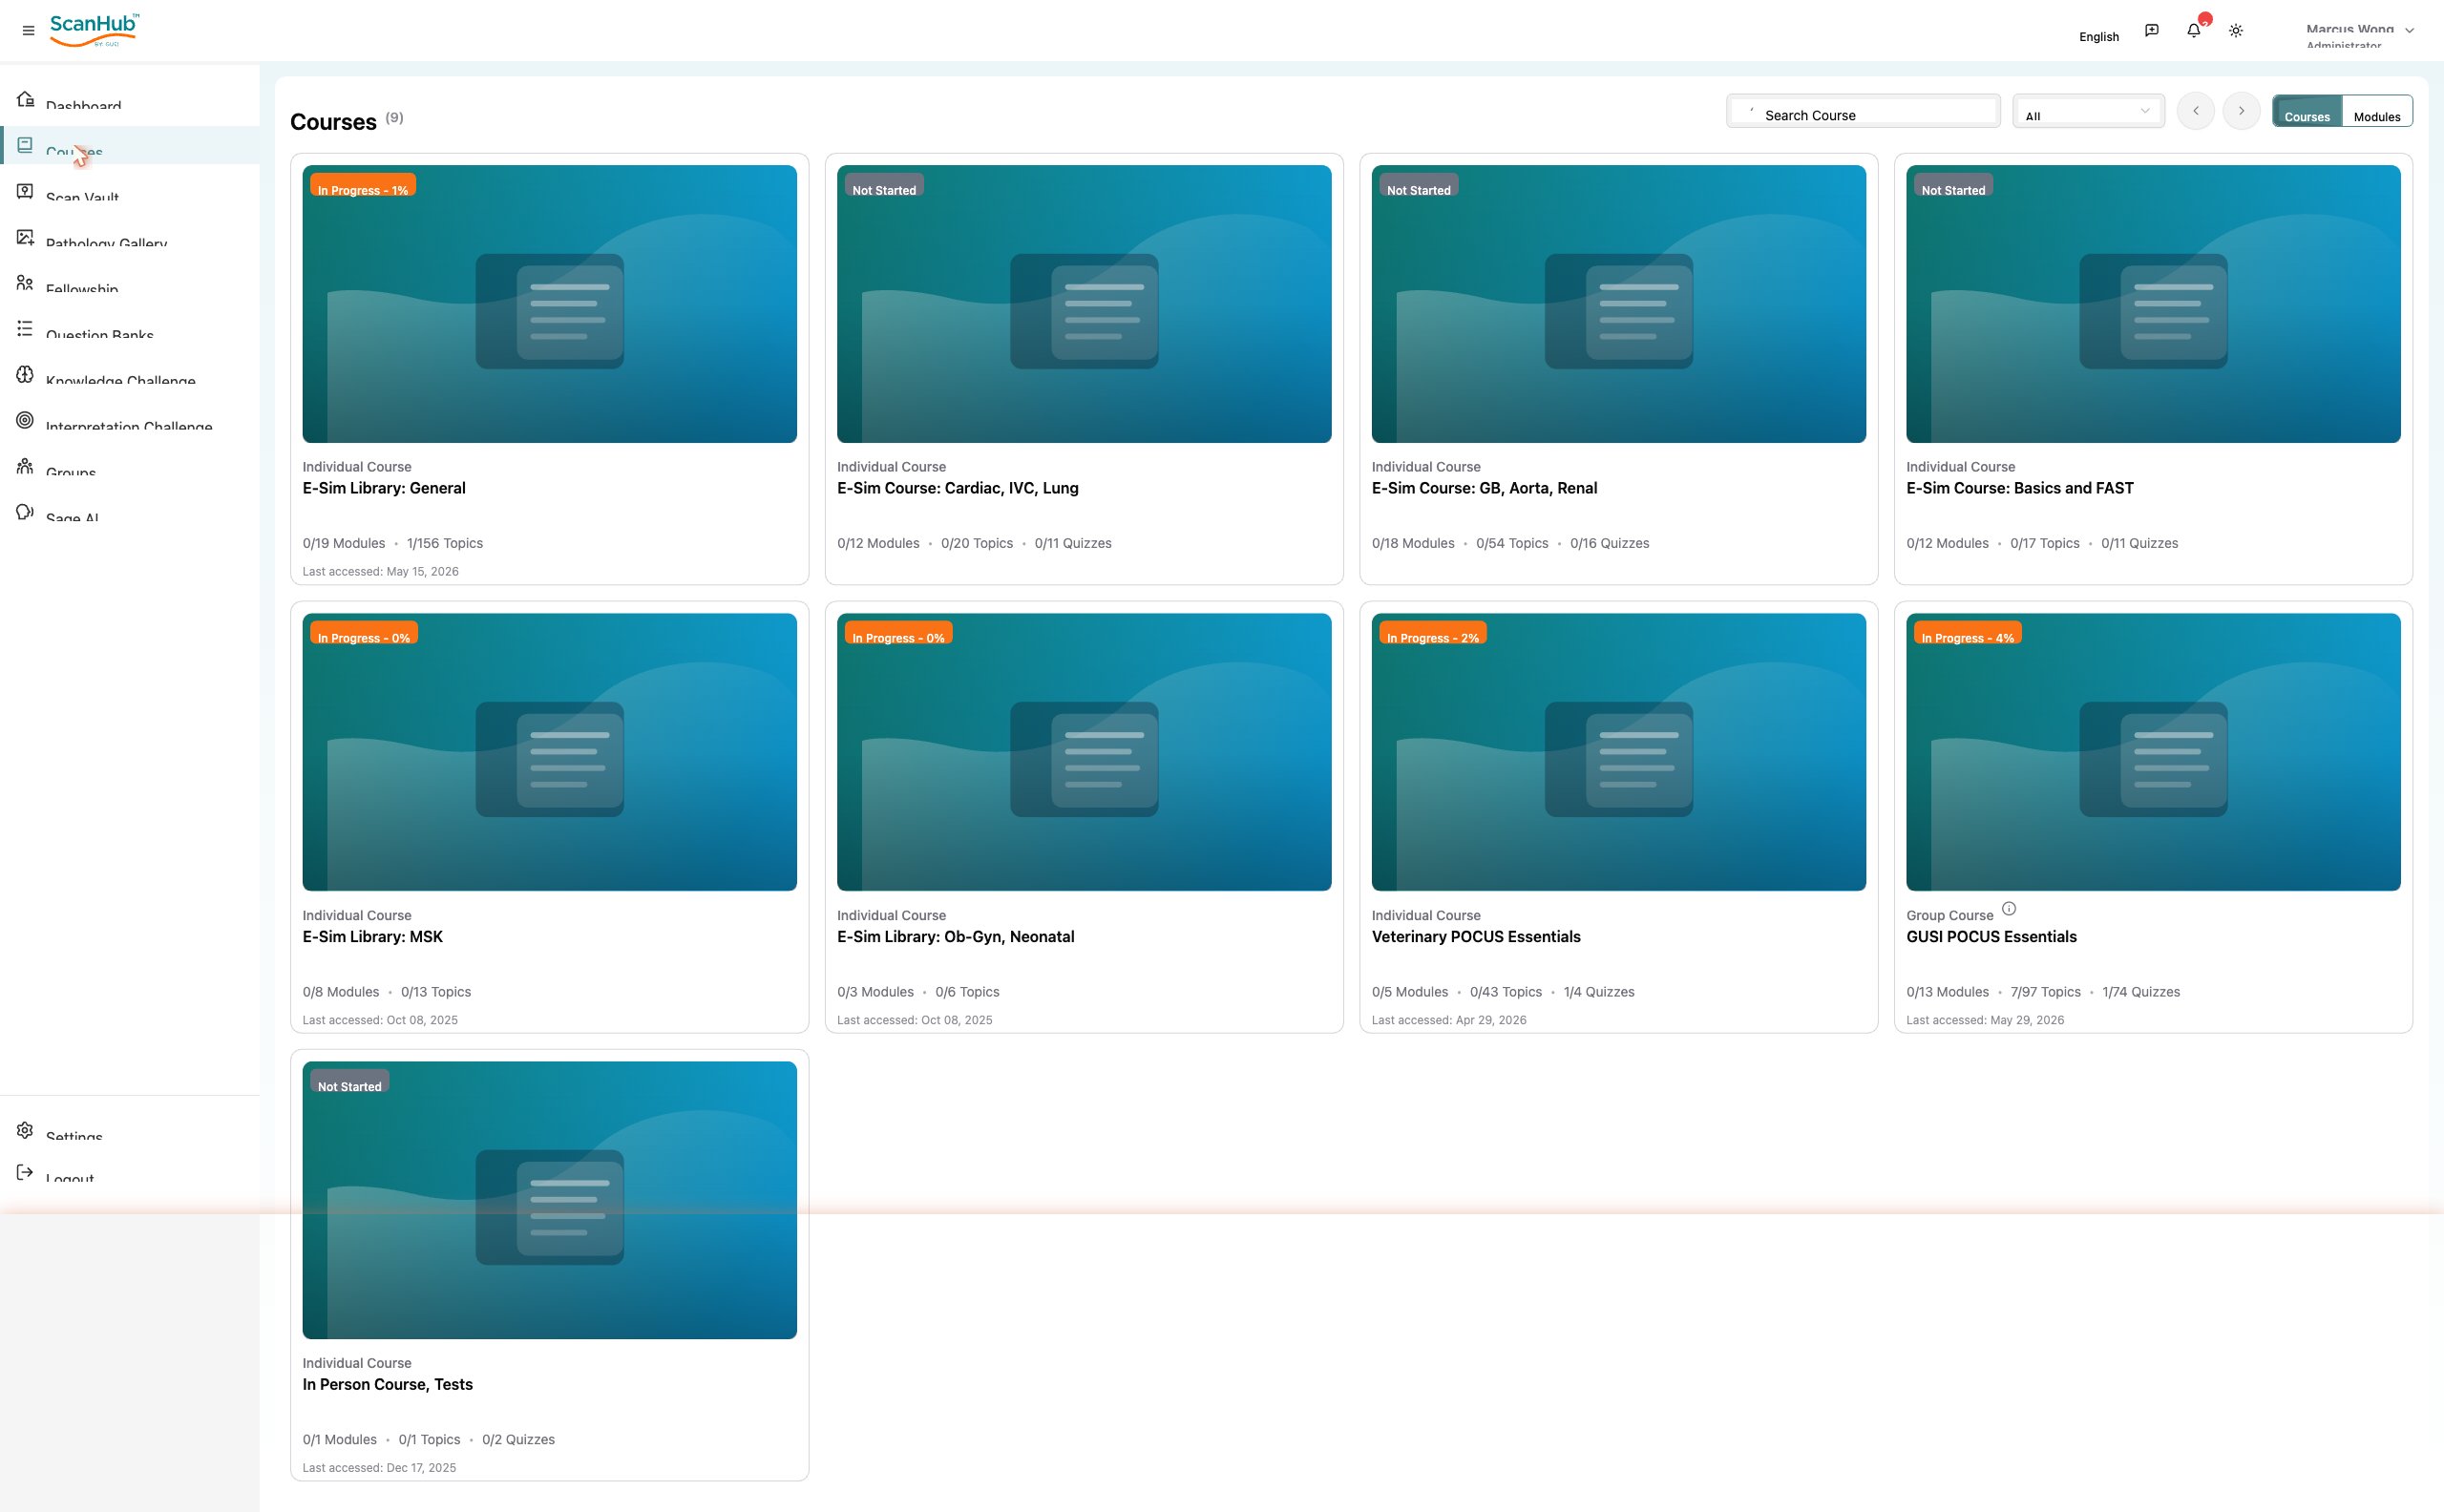
2. Take a course
- Click Courses in the navigation rail to see the courses available to you.
- Click a course card to open its overview, then click Resume Course or pick a module.
- Open a module to start its first lesson. Lessons play in the main panel; the full course outline sits on the right so you can jump between topics.
- Work through the topics in order. Your progress saves automatically (look for the “Saved” indicator) and completed topics are checked off in the outline.
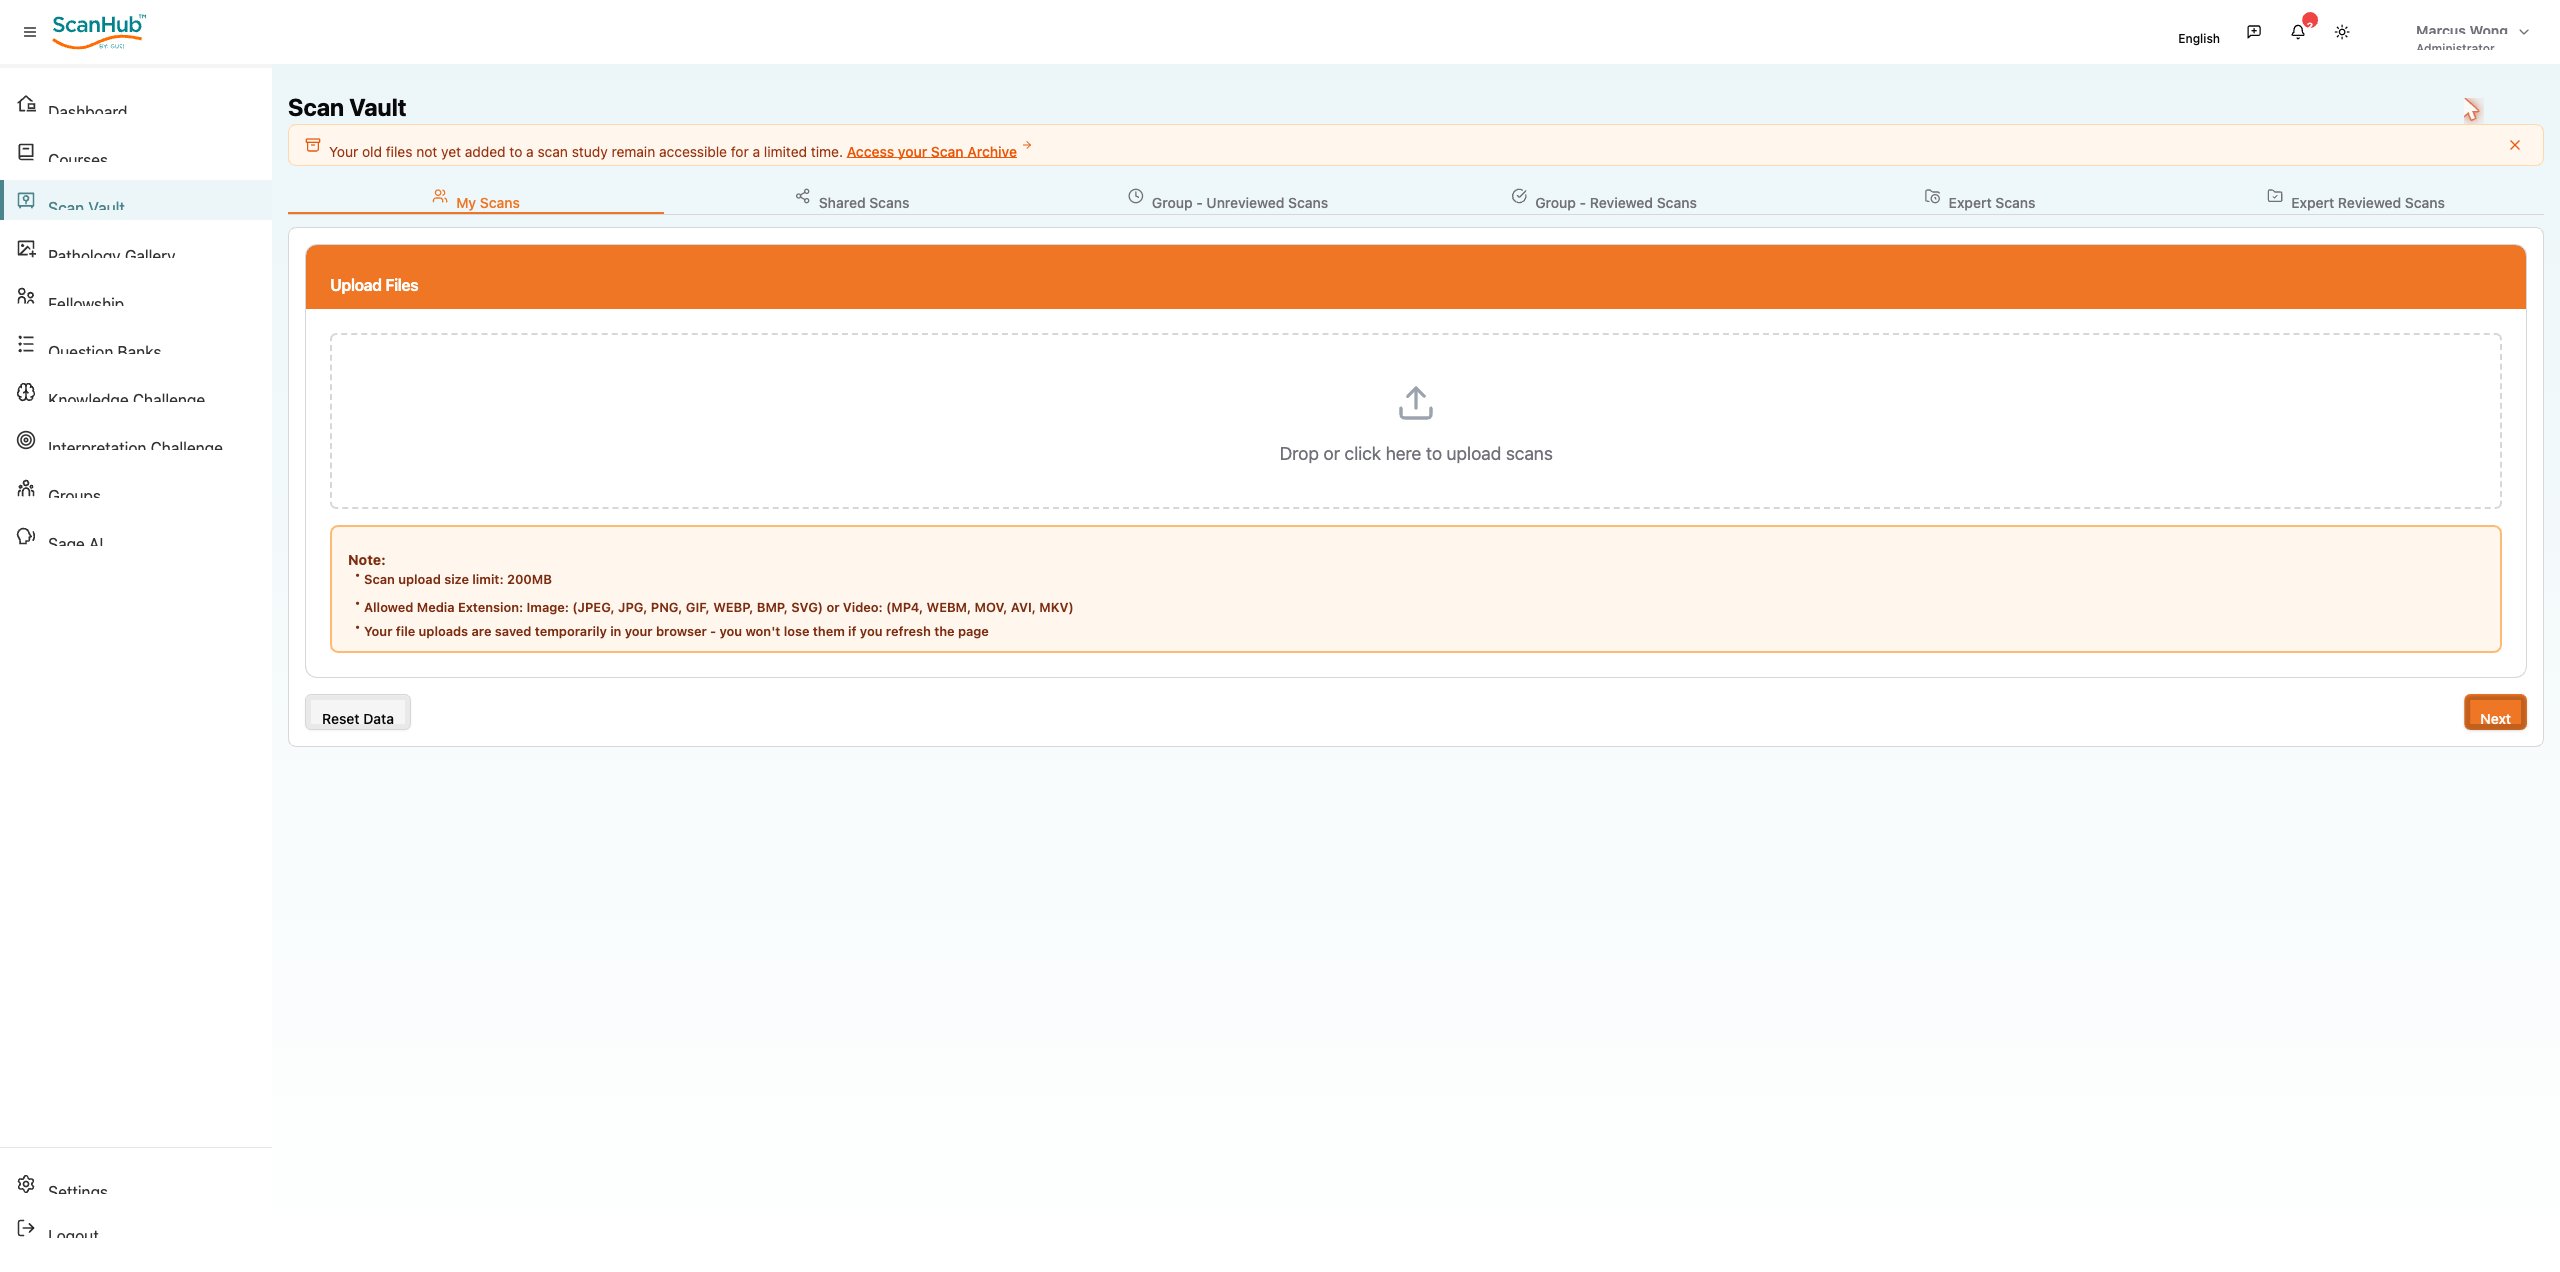
3. Upload a scan to the Scan Vault
- Click Scan Vault, then click Create Scan Study in the top-right.
- Drag your scan files onto the upload area, or click it to browse. Images (JPEG, PNG, GIF, WEBP, BMP, SVG) and video (MP4, WEBM, MOV, AVI, MKV) are accepted, up to 200 MB.
- Click Next and complete the study details, then submit. Your scan moves through the review pipeline and appears under My Scans with a status.
- Uploads are held temporarily in your browser, so they survive a page refresh — but submit the study to store them permanently.
- Track each scan’s status on the Dashboard: Pending → Processing → Submitted → Reviewed (or Failed).
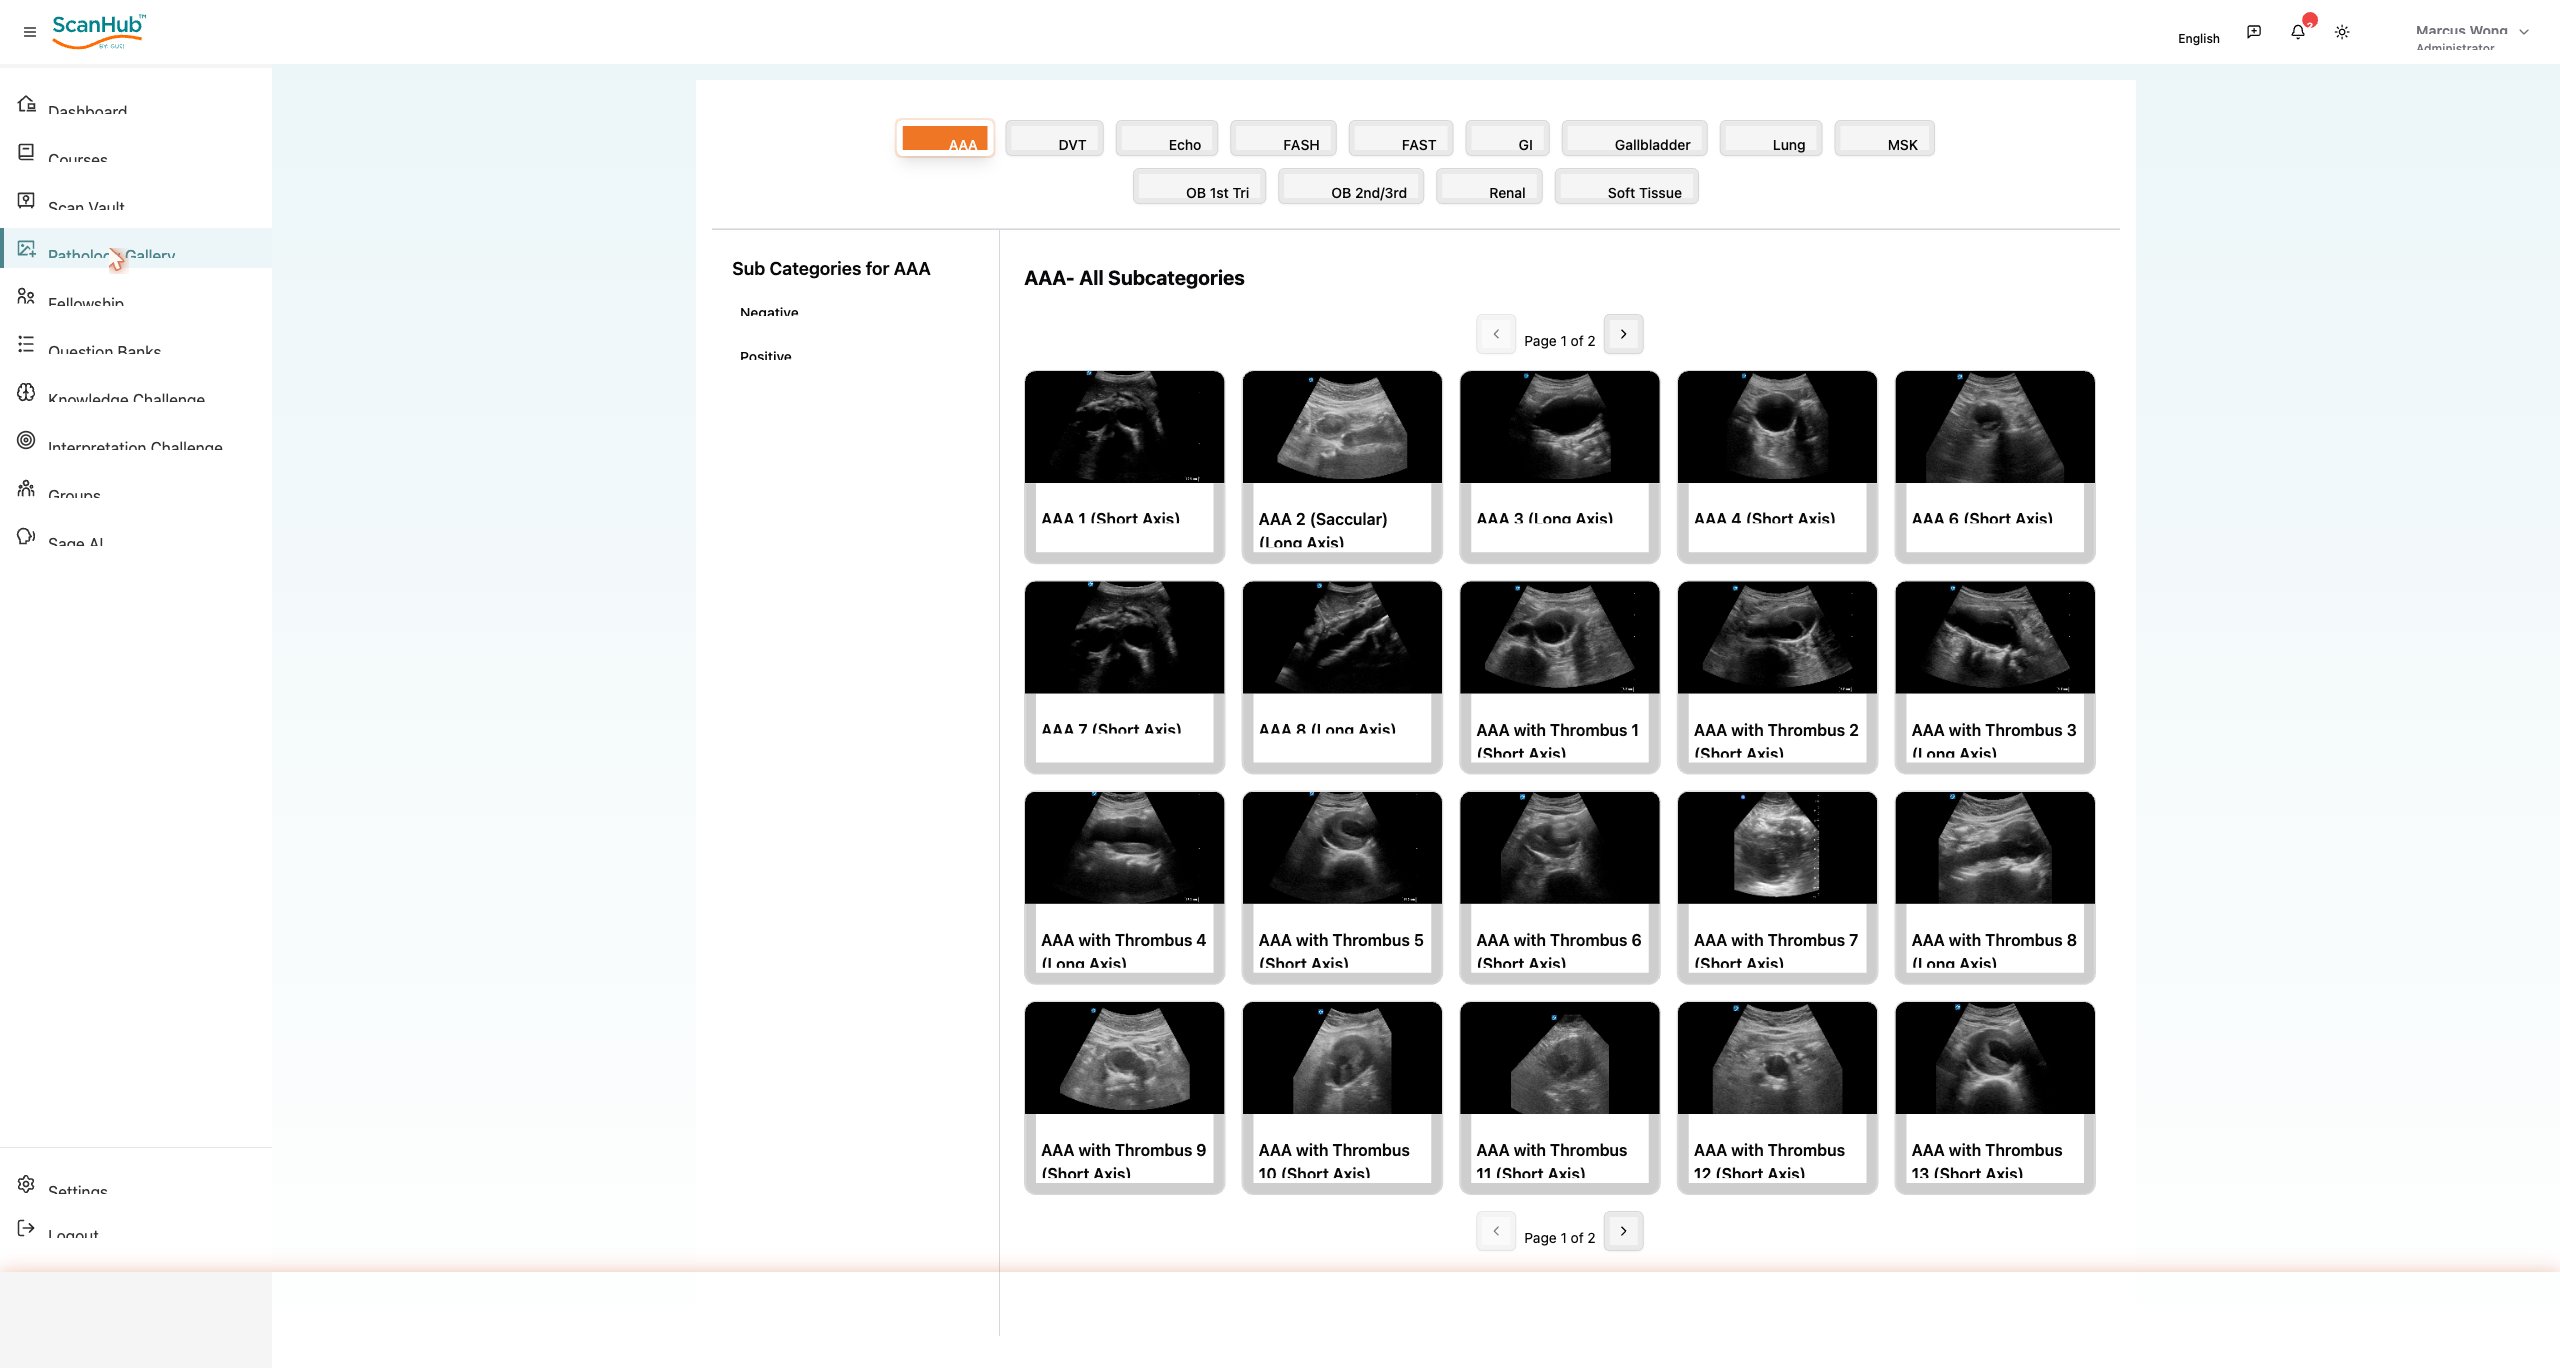
4. Browse the Pathology Gallery
- Click Pathology Gallery.
- Choose a body system from the chips along the top (AAA, Echo, FAST, Lung, Renal, OB and more).
- Narrow the list using the Negative / Positive sub-categories on the left, then click any thumbnail to open the clip.
- In the viewer, play the clip and use the heart icon to save a case or the share icon to send it.
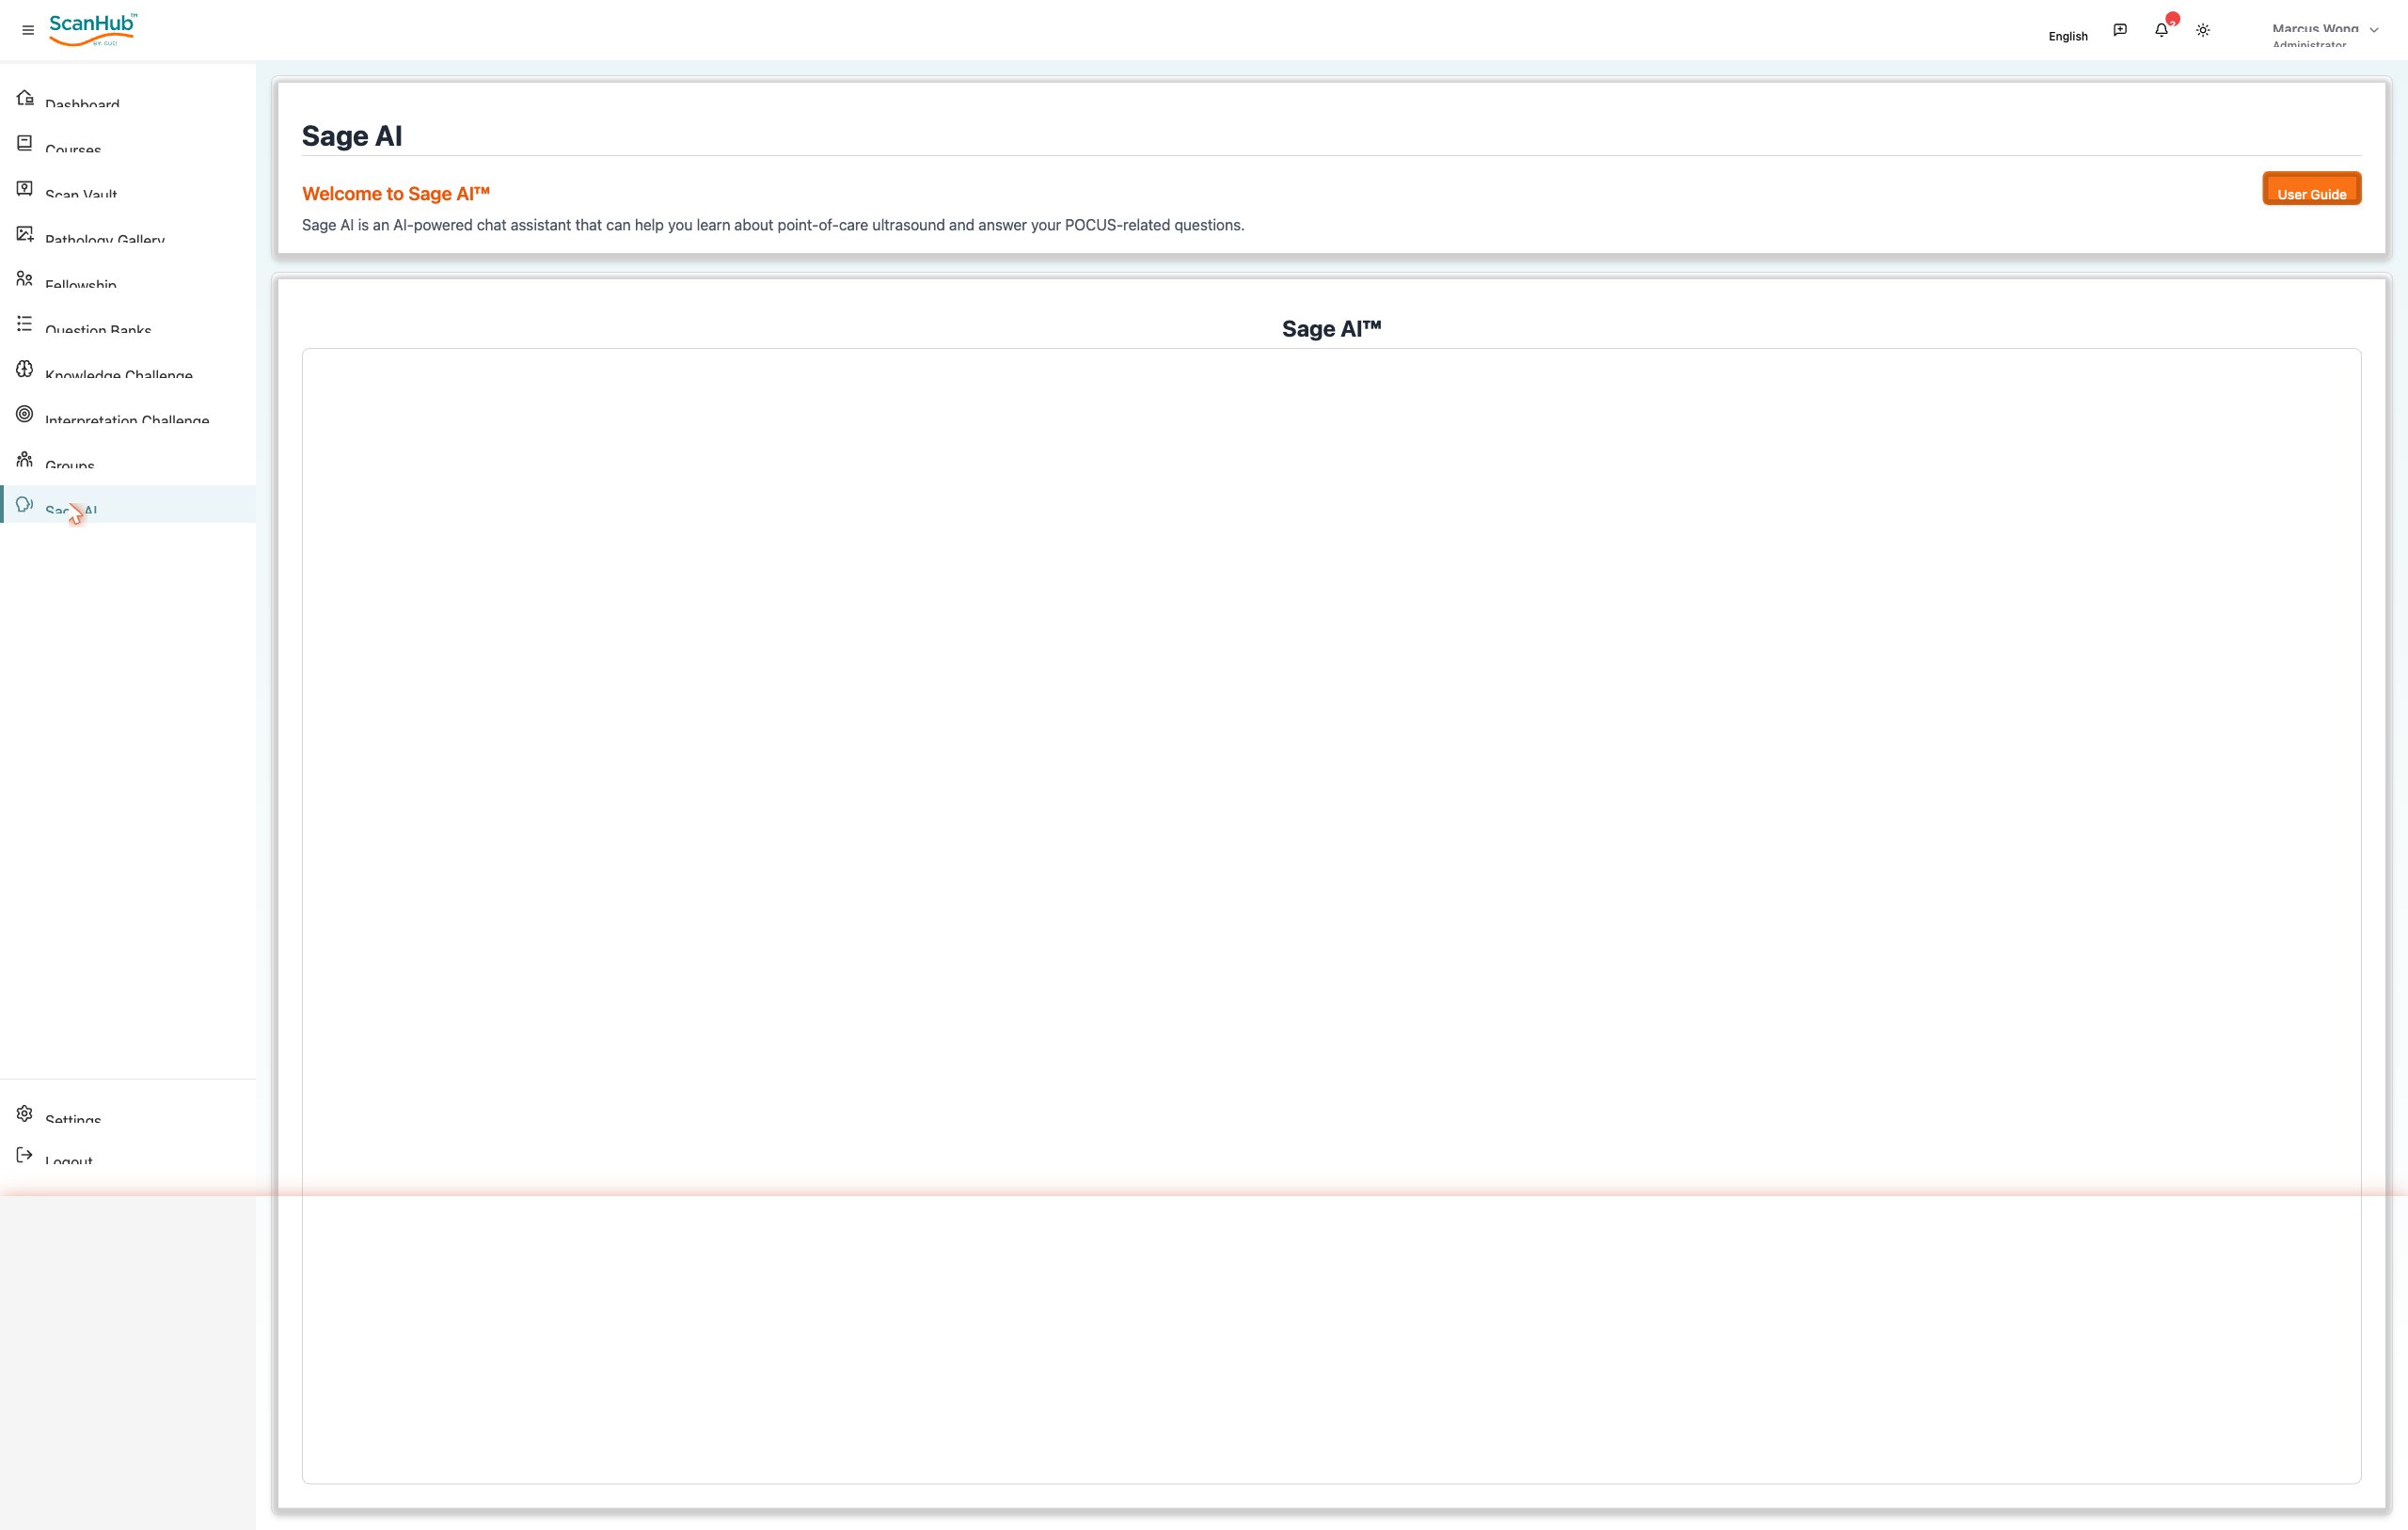
5. Practice and ask Sage AI
Reinforce what you have learned, then get answers on demand:
- Question Banks — pick a topic bank and click Start Quiz for timed, multiple-choice practice.
- Knowledge Challenge — choose a course, question type and category for course-linked questions.
- Interpretation Challenge — choose an exam type and challenge type to practice reading scans.
- Sage AI — type a POCUS question into the chat; answers cite the relevant GUSI courses.
That is everything you need to start. Part II documents every screen in detail.
The frame is consistent across the application.
Left navigation rail
Lists the ten main areas (Dashboard through Sage AI) with Settings and Logout pinned to the bottom. The hamburger icon next to the ScanHub logo collapses or expands the rail to give the main panel more room.
Top bar
- Language selector — switches the interface language (English by default).
- Feedback — opens a channel to send feedback to the ScanHub team.
- Notifications — the bell shows a badge with the number of unread alerts.
- Theme toggle — switches between light and dark appearance.
- Profile menu — your name and role; opens the account menu.
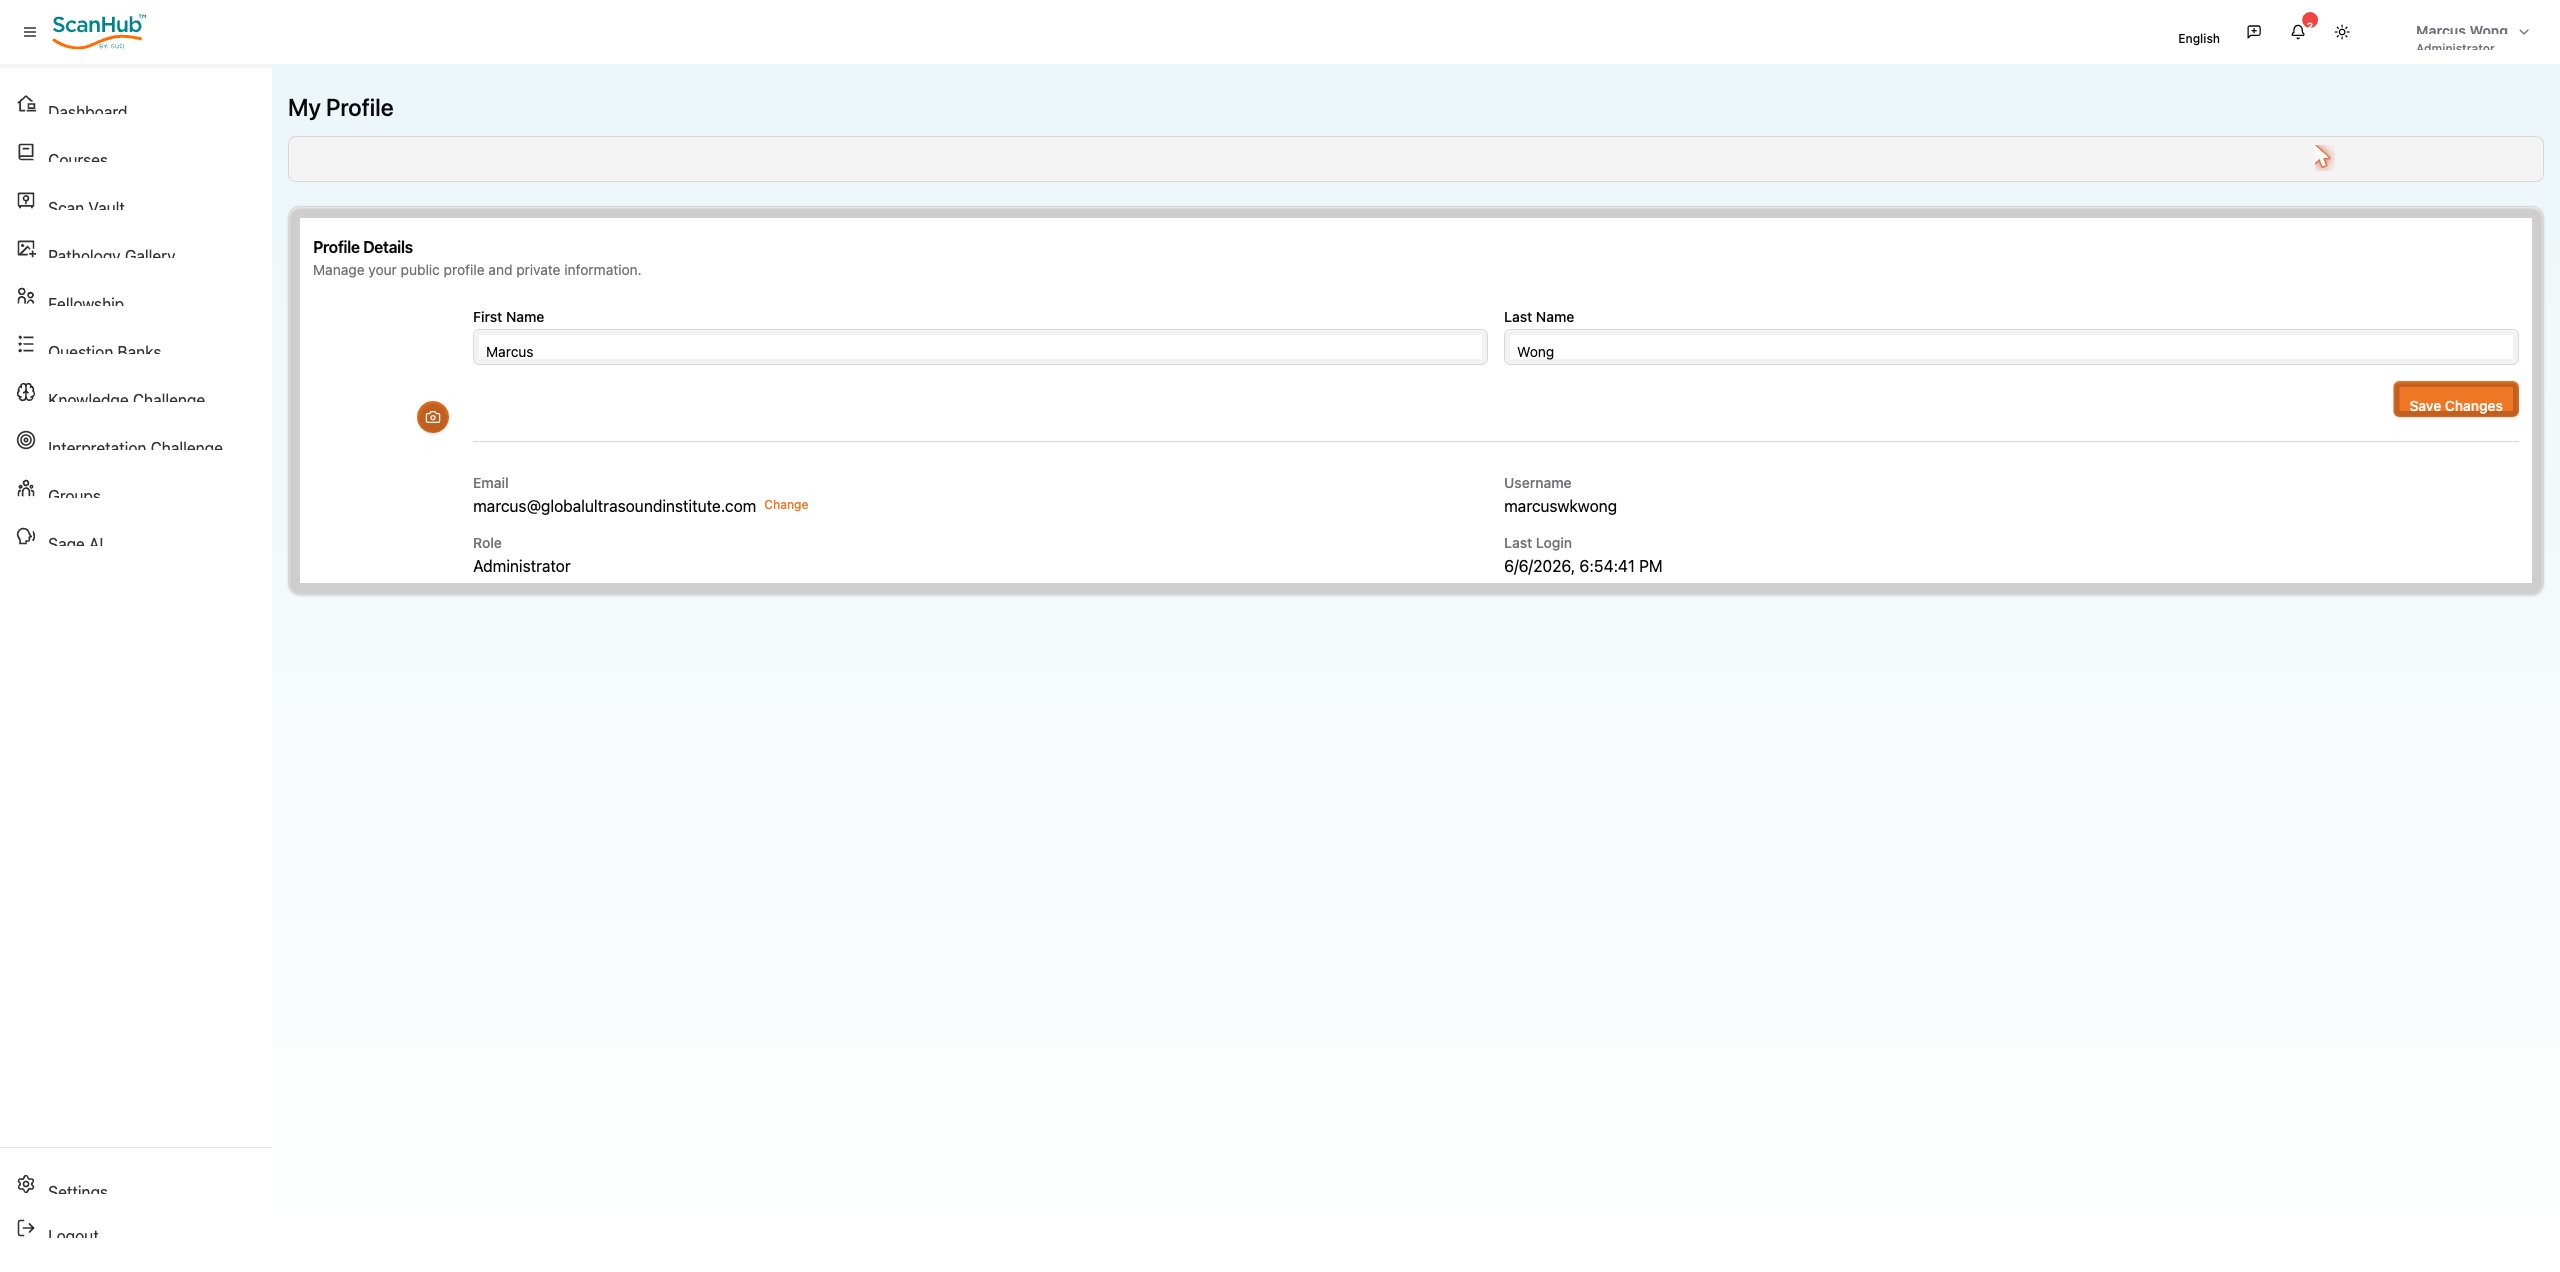
Profile menu
Clicking your name opens a menu showing your name, email and username, plus four actions: Profile, My Referrals, My Certificates and Logout.
Navigation map
| Area | What you use it for |
|---|---|
| Dashboard | Personal progress, scan pipeline and assignments |
| Courses | Structured courses, modules and lessons |
| Scan Vault | Upload, store, share and track scans |
| Pathology Gallery | Curated ultrasound clips by body system |
| Fellowship | Mentor and mentee fellowship sessions |
| Question Banks | Topic-based practice quizzes |
| Knowledge Challenge | Course-linked multiple-choice questions |
| Interpretation Challenge | Exam-style scan interpretation drills |
| Groups | Manage classes and sub-groups |
| Sage AI | AI chat assistant for POCUS questions |
| Settings | Group notification preferences |
Scan status reference
| Status | Meaning |
|---|---|
| Pending | Submitted and waiting to be processed |
| Processing | Being prepared or analyzed |
| Failed | Could not be processed — re-check and resubmit |
| Submitted | Sent for expert review |
| Reviewed | Review completed by an expert |
Accepted scan upload formats
| Type | Extensions | Limit |
|---|---|---|
| Images | JPEG, JPG, PNG, GIF, WEBP, BMP, SVG | 200 MB |
| Video | MP4, WEBM, MOV, AVI, MKV | 200 MB |
Need help inside the app? Open Sage AI for POCUS questions, or use the feedback icon in the top bar to reach the ScanHub team.
Getting Help
- Technical support: support@gusipocus.com
- Educational support / program coordinator: fellowships@gusipocus.com
- Use in-platform search to find content quickly; bookmark frequently used sections; keep a stable internet connection
Video Tutorials (Google Drive)
- Scan Upload and Review Tutorial
- Scan Upload and Review (with dub)
- Internal Scan Review Upload – Student POV
- Internal Scan Review Upload – Group Leader POV
- External Scan Review Upload – Group Leader POV
Final Words
- Every scan upload = growth step
- Normal scans are as valuable as abnormal scans
- Ask questions — your mentors are here to guide you
- Consistency, not perfection, builds skill
- Profile (
→ Profile):
☰ view details; update first name, last name, profile photo; change password; delete account
- Change password: Profile → Edit Profile → Change Password → enter current, new, and confirmed password → Submit
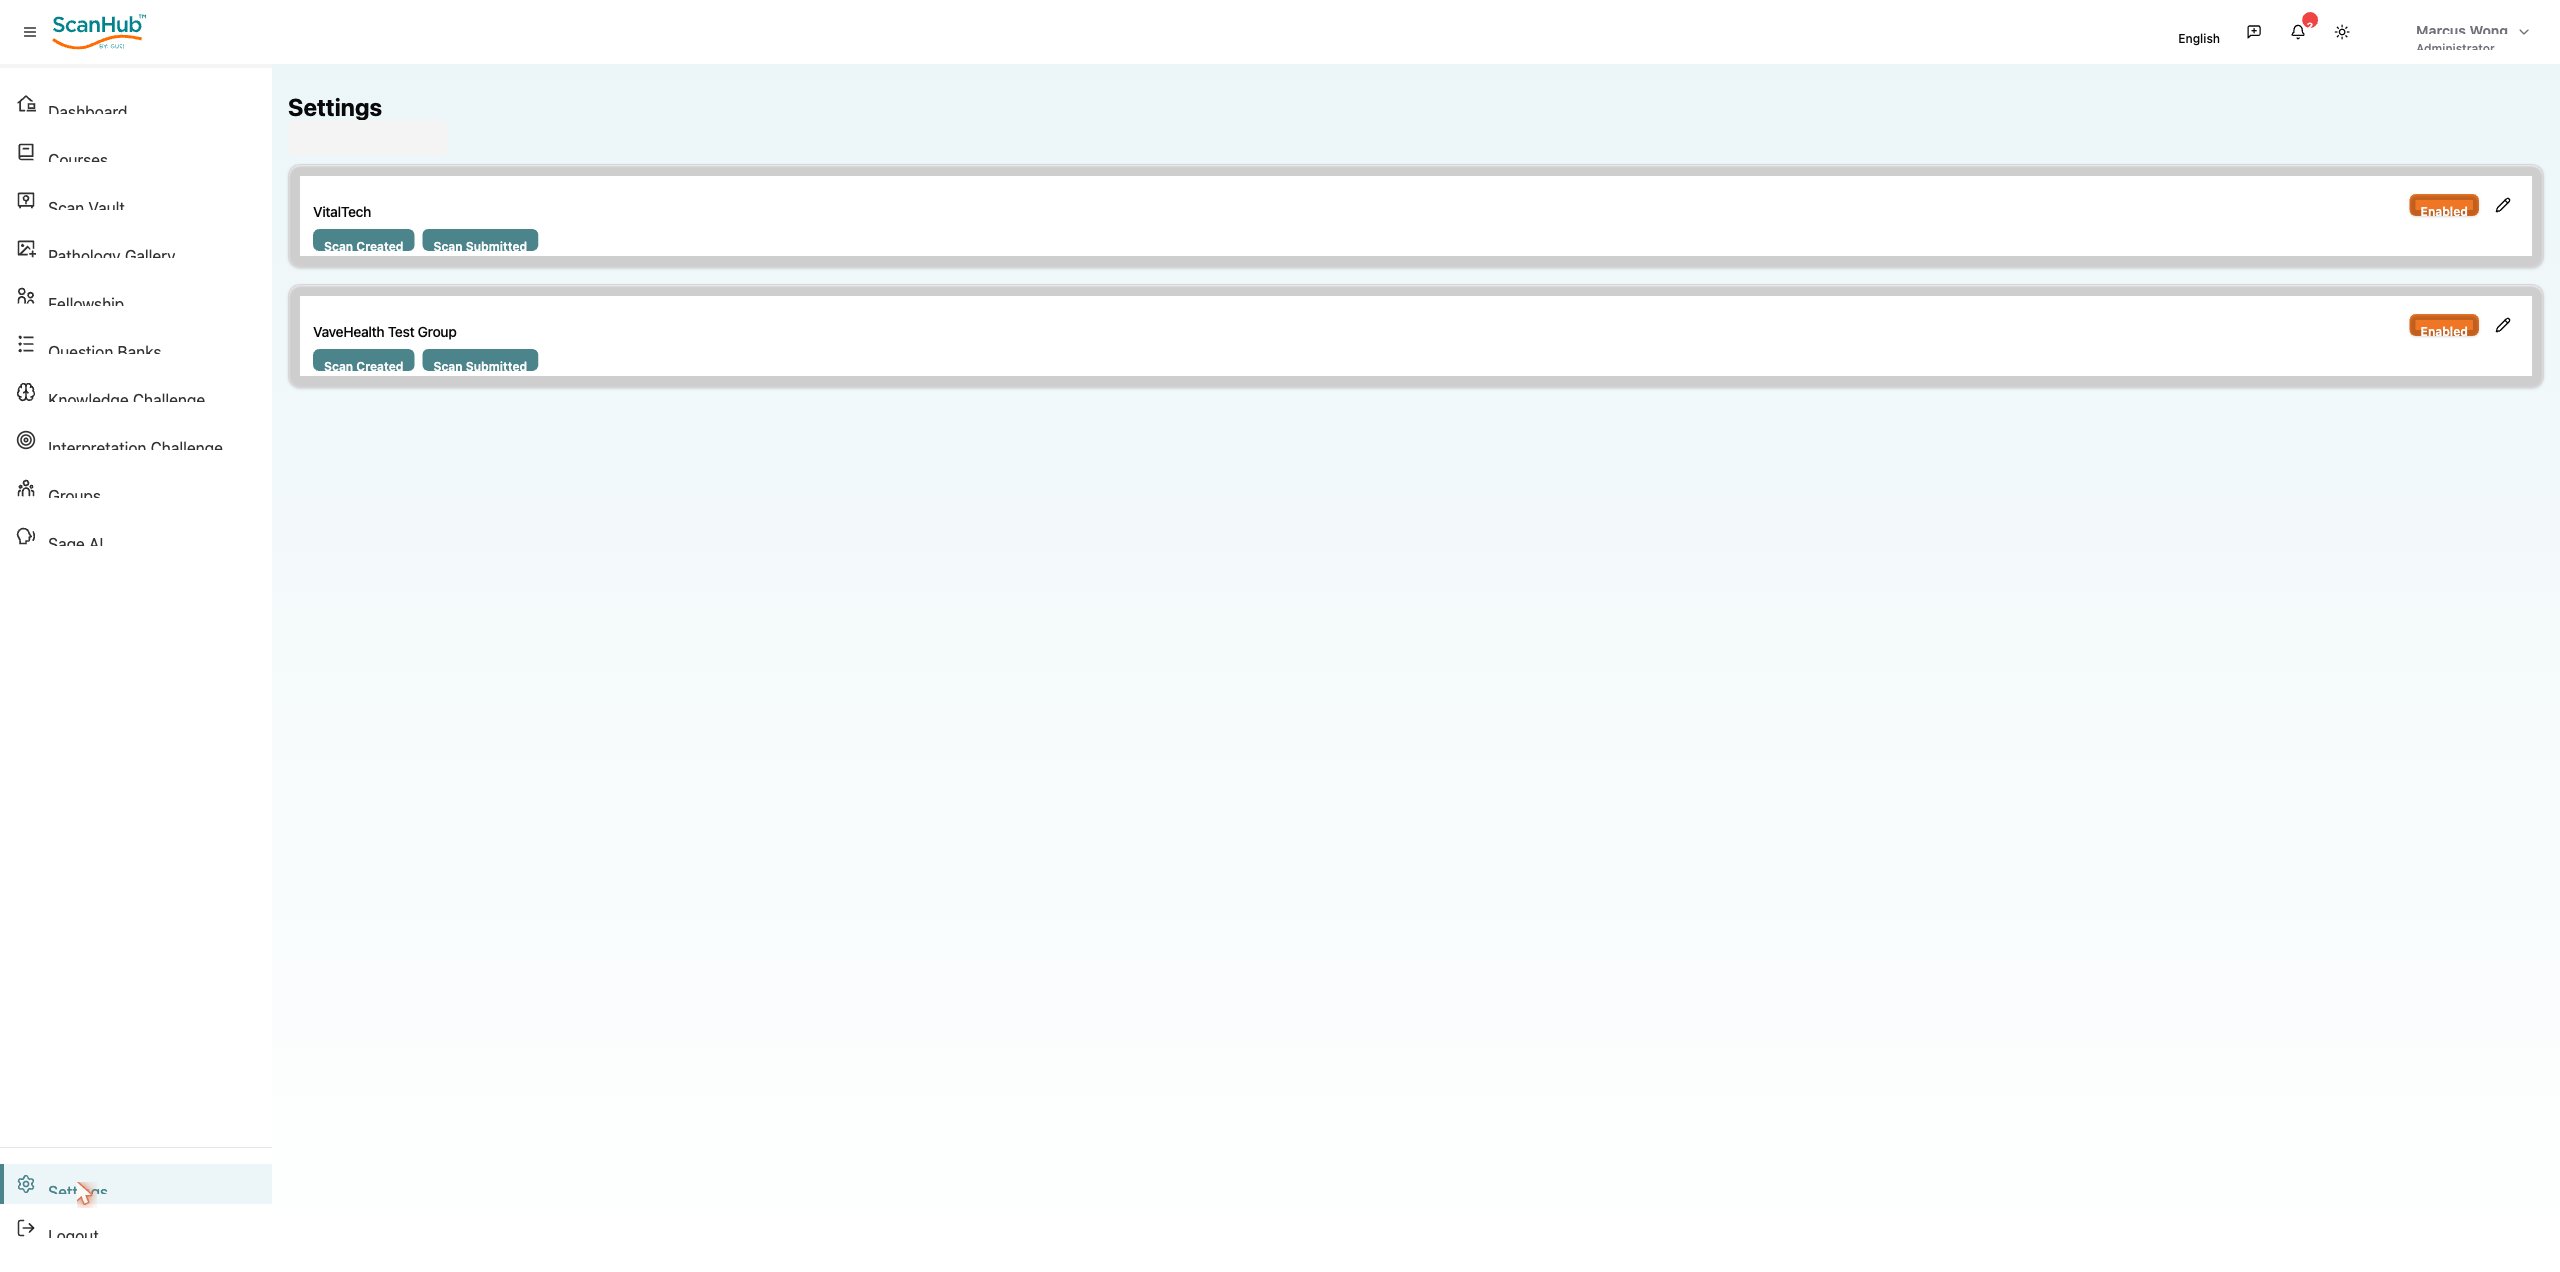
- Settings: notification preferences, timezone and language, privacy and sharing permissions, professional credentials
- Logout: always use the Logout button to end your session securely; save work first and clear the browser cache on shared computers
Purpose: AI-powered assistant providing instant, expert-validated ultrasound guidance — identify key structures, improve accuracy, and support decisions while scanning or reviewing.
- Upload images for AI-assisted analysis and preliminary diagnostic suggestions
- Use AI for measurement and quantification; compare AI findings with your own judgment. Always verify AI findings against your clinical expertise and established protocols.
Important: AI suggestions assist clinical decision-making — they do not replace professional
ScanHub is GUSI’s all-in-one educational and professional development platform for ultrasound imaging and medical diagnostics. It supports healthcare professionals from initial training through advanced fellowship programs. The modules below make up the platform.
Purpose: Your central hub — a concise summary of your activities, progress, and key notifications.
- Access your primary metrics and quick statistics
- View recent activity summaries and check system notifications
- Navigate to other sections using the overview cards
- Monitor your overall progress across all modules taken and scans submitted and reviewed.
In the mobile app: tap the hamburger icon → Dashboard to see a summary of courses ☰
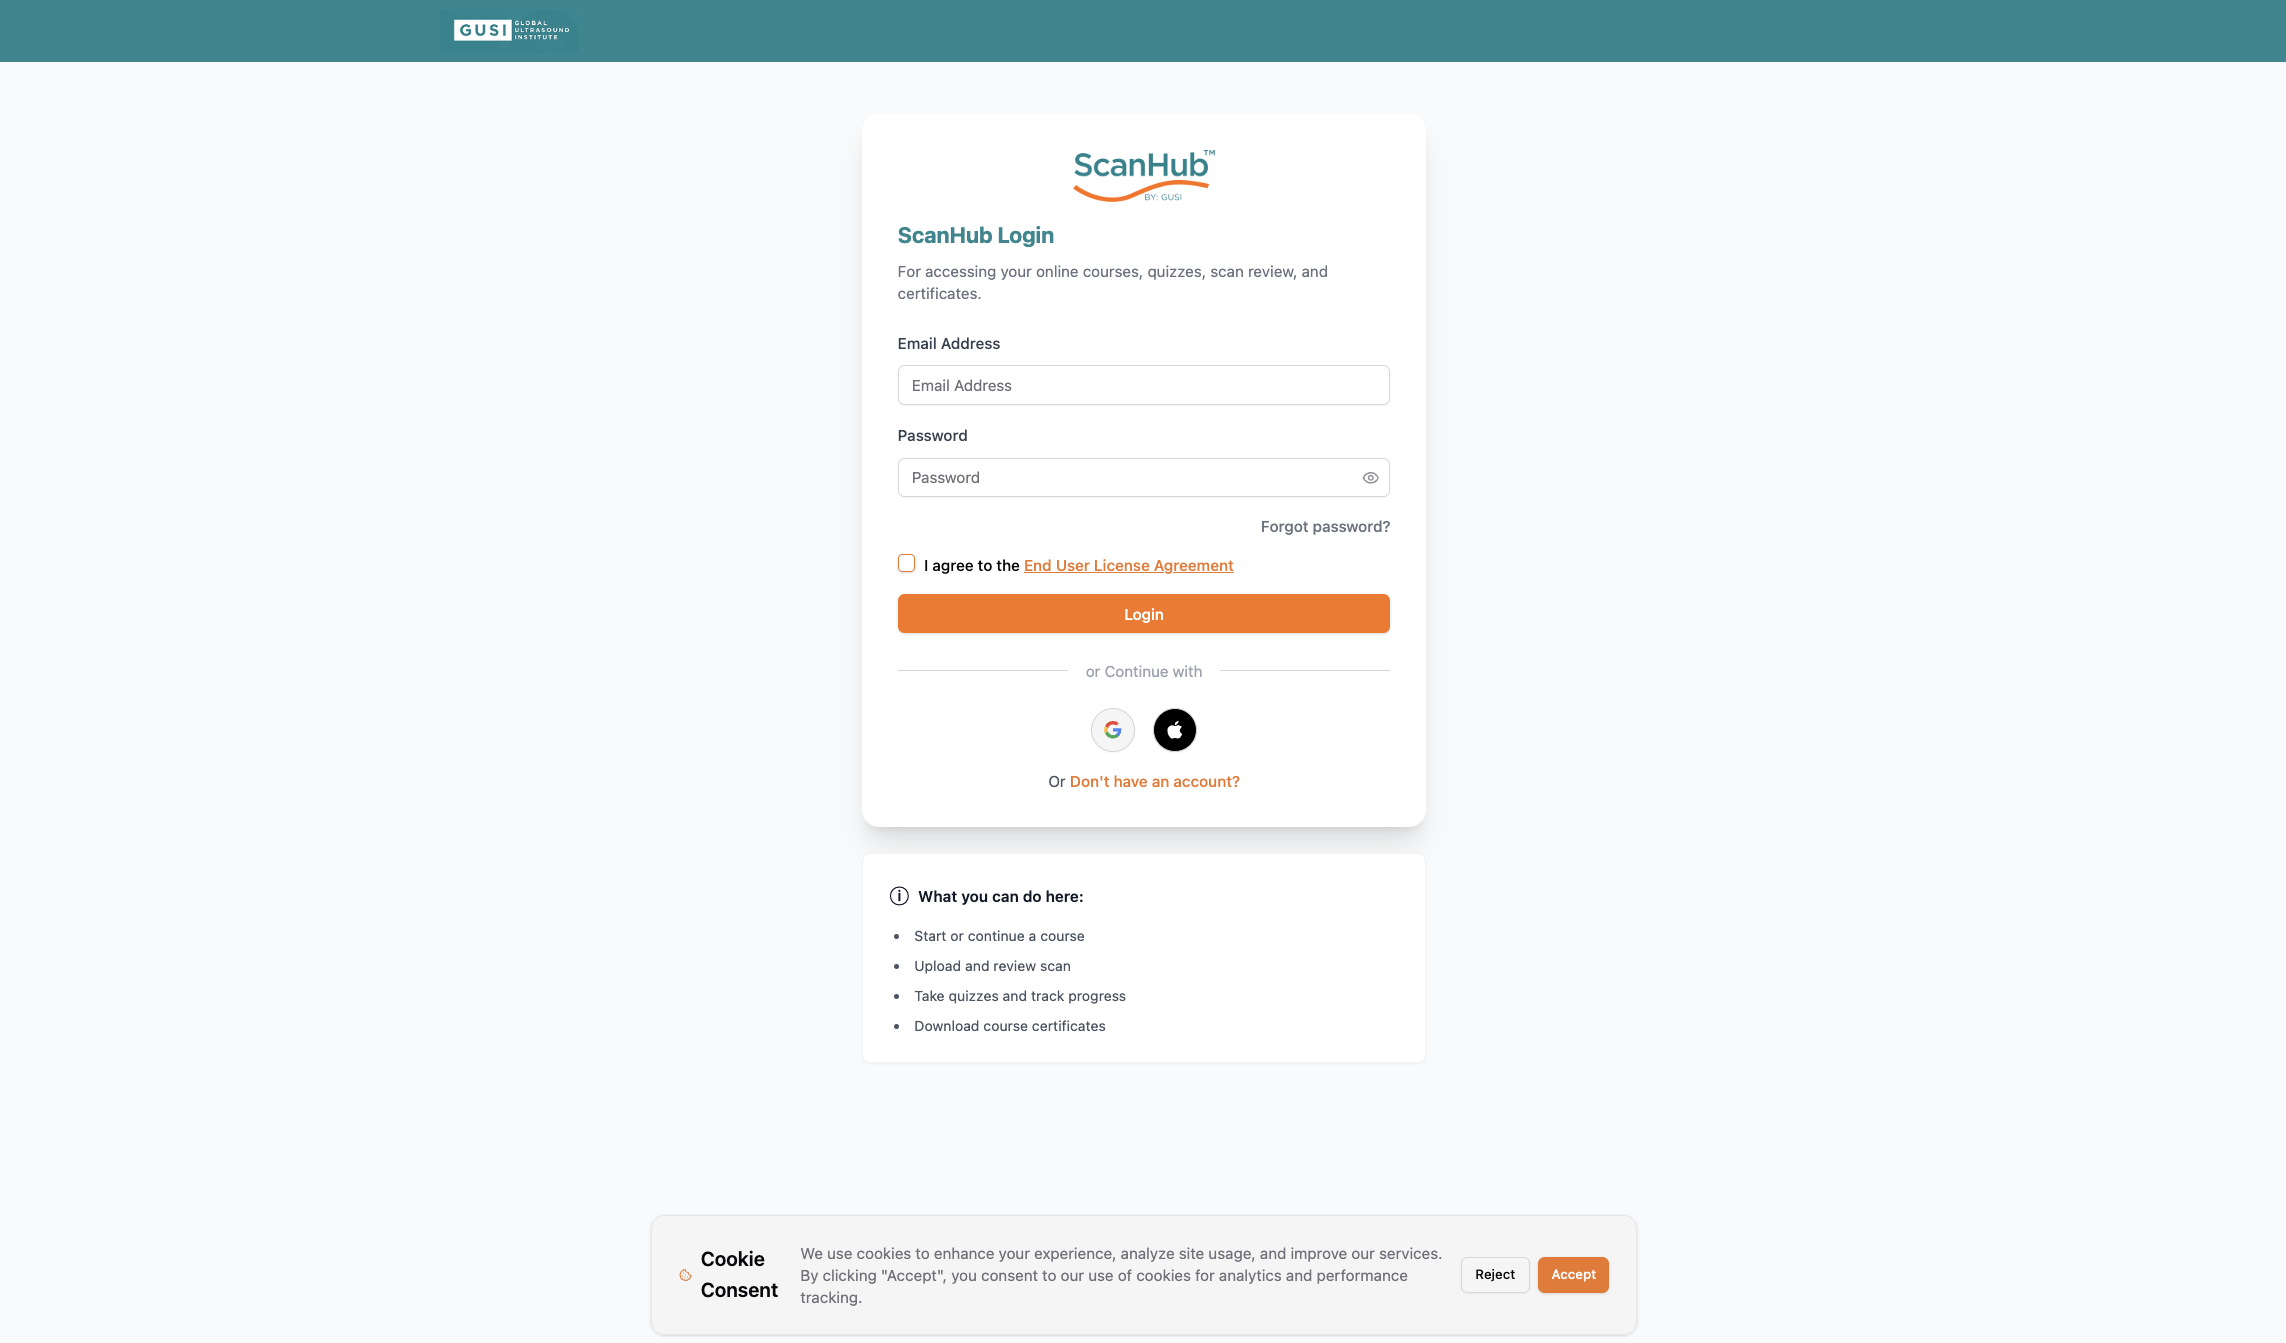
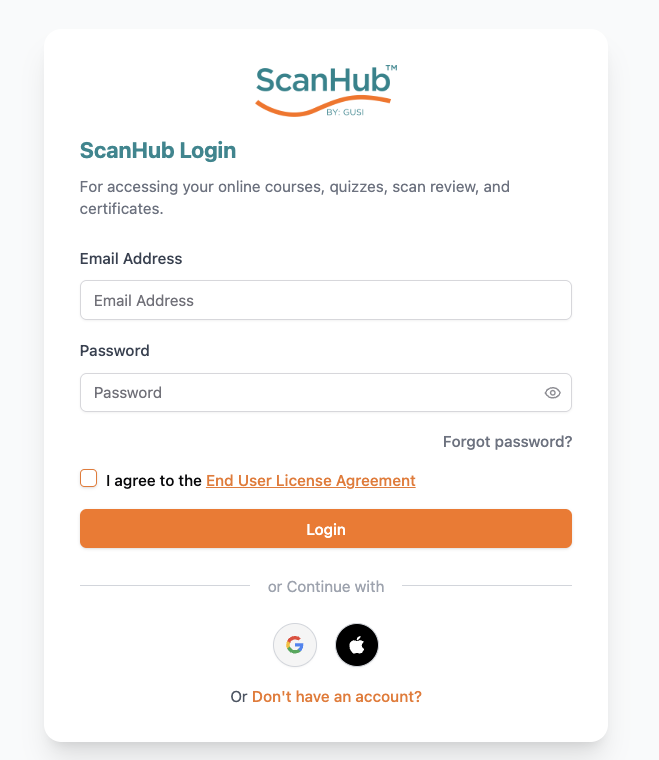
Logging In
Enter your valid username or email and password, then tap Login.
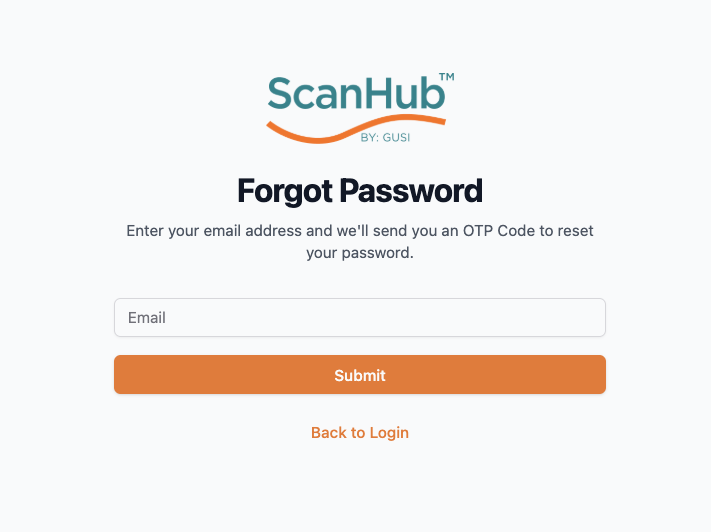
Forgot Your Password?
- Tap Forgot Password and enter your registered email address.
- You’ll receive an OTP in your email. If you don’t see it, check your spam folder.
- On the OTP Verification screen, enter the OTP.
- Once verified, you’ll be taken to the Reset Password screen where you can create a new password.
New User Registration
- Tap Register and enter your username, email, password, and promo code (if you have one).
- Tap Sign Up to continue.
- You’ll receive an OTP in your email to complete your registration.

Getting Started Checklist
- Complete your profile in the Settings section
- Set notification preferences to stay informed
- Configure your timezone and language settings
- Explore the Dashboard to familiarize yourself with the interface
- Browse available courses in the My Courses section
- Review the Pathology Gallery to understand available resources
- Test the Scan Vault by uploading a sample image
- Connect with your mentor or group leader if enrolled in a fellowship